Author: jerrold (Page 8 of 19)

clock pdf

Clock PDFs offer versatile tools for learning and crafting‚ providing customizable templates for educational purposes. They help students and educators practice time-telling with interactive designs‚ printable formats‚ and adaptable styles to suit various needs.

Overview of Clock PDFs and Their Uses

Clock PDFs are versatile tools designed to meet various educational and creative needs. They provide customizable templates for teaching time-telling skills‚ crafting‚ and scrapbooking. These printable resources are widely used in classrooms and homes to help students practice reading analog and digital clocks. Many templates offer movable hands‚ allowing users to simulate different times for interactive learning. Others feature blank clock faces‚ enabling learners to draw numbers and hands themselves. Clock PDFs are also popular for DIY projects‚ such as creating wall art or educational aids. Their adaptability makes them suitable for different age groups and learning styles. Additionally‚ some designs include Roman numerals or themed elements‚ adding visual appeal. Overall‚ clock PDFs are practical and engaging resources for both educational and creative purposes‚ offering endless possibilities for customization and use.

Importance of Printable Clock Templates

Printable clock templates are essential tools for teaching time-telling skills‚ especially for children. They provide a hands-on approach to learning‚ making the concept of time more tangible and engaging. These templates are customizable‚ allowing users to tailor them to different learning levels or creative projects; For educators‚ they serve as invaluable resources for crafting interactive lessons and activities. The ability to print multiple copies ensures that every student can have their own material‚ fostering individual practice. Additionally‚ printable clock templates are cost-effective and convenient‚ eliminating the need for expensive teaching aids. They also cater to various learning styles‚ offering visual and tactile experiences that enhance understanding. Whether for classroom use or home learning‚ these templates are versatile and practical‚ making them a staple in time-telling education and creative endeavors.

Types of Clock PDFs Available Online

Clock PDFs come in various styles‚ including blank faces‚ customizable templates with movable hands‚ and digital or analog designs. They cater to educational needs‚ crafting projects‚ and personal use‚ offering flexibility and convenience.

Blank Clock Faces for Educational Purposes

Blank clock faces are essential tools for teaching time-telling skills‚ offering a customizable canvas for educational activities. These templates‚ available in various styles‚ allow students to draw numbers‚ hour and minute hands‚ and practice time concepts. Many designs are available in black and white or color‚ catering to different learning preferences. Teachers can use these printable resources to create engaging classroom exercises‚ such as matching games or labeling tasks. Blank clock faces also support crafting projects‚ enabling students to create functional or decorative clocks. With options for digital and analog formats‚ these templates provide flexibility for diverse learning needs. They are widely accessible online‚ often as free downloads‚ making them a convenient choice for educators and parents. By incorporating blank clock faces into lesson plans‚ educators can help students develop a strong foundation in time-telling and organization skills in an interactive and enjoyable way.

Customizable Clock Templates with Movable Hands

Customizable clock templates with movable hands are invaluable educational tools‚ allowing students to engage interactively with time-telling concepts. These templates feature adjustable hour and minute hands‚ enabling learners to practice setting specific times and understanding time relationships. Available in various styles‚ they cater to different skill levels‚ from basic to advanced. Many templates include numbered circles or blank faces‚ offering flexibility for customization. Teachers can use these resources to create hands-on activities‚ such as matching games or time conversion exercises. Additionally‚ movable hands encourage creativity‚ as students can design their own clock faces or explore complex time concepts like elapsed time and time zones. These templates are often downloadable as PDFs‚ making them easily accessible for both classroom and home use. By incorporating movable hands into learning‚ educators can help students build a deeper understanding of time management and analog clock functionality.

Digital and Analog Clock Designs

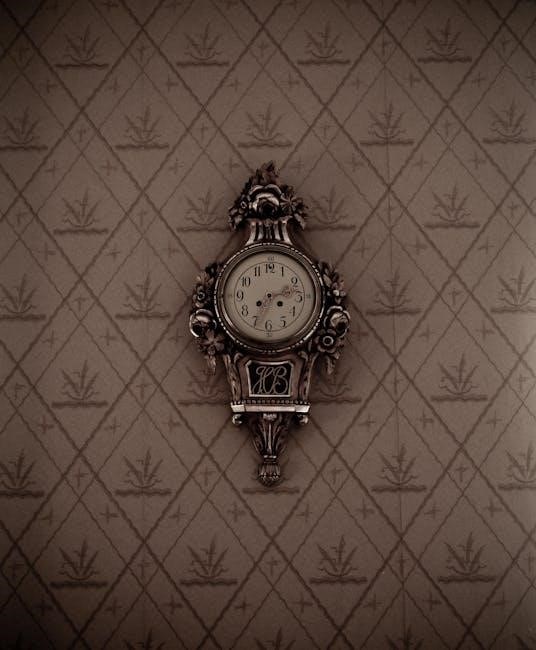
Digital and analog clock designs offer a wide range of styles and functionalities‚ catering to both educational and creative needs. Analog clocks feature traditional clock faces with hour and minute hands‚ often including Roman numerals or numbered markings for clarity. Digital clocks‚ on the other hand‚ display time in numeric formats‚ making them ideal for modern applications. These designs are available in various sizes‚ themes‚ and colors‚ allowing users to choose templates that suit their preferences. Many PDF templates include customizable elements‚ such as adjustable hands or interchangeable backgrounds‚ enabling users to personalize their clocks. Whether for teaching time-telling skills‚ crafting‚ or scrapbooking‚ these clock designs provide versatile tools. Additionally‚ themed clocks‚ such as vintage or minimalist styles‚ can enhance aesthetic projects. With options for both digital and analog displays‚ these resources cater to diverse needs‚ offering practical and artistic solutions for users of all ages.

Educational Resources and Worksheets

Clock PDFs feature a variety of digital and analog designs‚ allowing users to choose from traditional or modern styles. Analog clocks include classic faces with hour and minute hands‚ often with Roman numerals or numbered markings for easy time-telling. Digital clocks display time in numeric formats‚ ideal for those who prefer a straightforward approach. These designs are available in multiple sizes and themes‚ catering to educational purposes‚ crafting projects‚ or personal use. Customizable templates enable users to adjust hands or backgrounds‚ making them versatile for different needs. Whether for teaching children‚ creating DIY crafts‚ or enhancing scrapbook pages‚ these clock designs provide functional and artistic solutions. With options for both digital and analog displays‚ they offer practical tools for learning and creativity‚ ensuring there’s something for everyone to utilize effectively.

Time-Telling Worksheets for Kids

Time-telling worksheets for kids are essential tools for teaching children to read analog and digital clocks. These printable PDF resources feature engaging exercises‚ such as matching analog clock faces to digital times‚ drawing clock hands‚ and solving time-based problems. Worksheets are designed for various skill levels‚ from basic recognition of hour and minute markings to advanced concepts like half-past‚ quarter-past‚ and elapsed time. Many templates include visual aids‚ such as numbered clock faces or step-by-step instructions‚ to guide young learners. Interactive activities‚ like coloring or cutting out clock hands‚ make learning fun and hands-on. Parents and educators can download these worksheets in multiple formats‚ including PDF and PNG‚ ensuring compatibility with different printing needs. By practicing with these materials‚ children build confidence in telling time accurately and understanding time vocabulary; These resources are ideal for classroom lessons‚ homeschooling‚ or personal use‚ offering a structured approach to mastering time-telling skills in an enjoyable way.

Interactive Clock Activities for Learning

Interactive clock activities provide engaging ways to teach time-telling skills‚ making learning fun and dynamic. These resources include hands-on tasks‚ such as assembling DIY clocks‚ movable clock hands‚ and matching games. Students can practice setting times‚ understanding hour and minute relationships‚ and converting between analog and digital formats. Many activities feature customizable templates‚ allowing educators to tailor exercises to different skill levels. For example‚ younger learners can start with simple tasks like placing stickers to mark hours‚ while older students can tackle complex problems involving elapsed time. These activities are often paired with printable worksheets and visual guides‚ offering a comprehensive learning experience. By incorporating interactivity‚ these tools help students develop a deeper understanding of time concepts in an enjoyable and immersive way. Such resources are ideal for both classroom instruction and home-based learning‚ ensuring that kids stay engaged while mastering essential time-telling skills.

How to Create and Use Clock PDFs

Clock PDFs are easy to create and use‚ offering customizable templates for educational and creative projects. Download‚ print‚ and edit designs to suit your needs‚ enhancing learning and crafting experiences effectively.

Step-by-Step Guide to Making a DIY Clock

Creating a DIY clock is an engaging activity that combines creativity with practical skills. Start by downloading a printable clock template from a reliable source‚ ensuring it suits your purpose‚ whether educational or decorative. Print the template on sturdy paper or cardstock for durability. Next‚ cut out the clock face and any additional components‚ such as movable hands or numbers. Use a craft knife or scissors for precise cuts. Assemble the clock by attaching the hands with a paper fastener or small pin‚ allowing them to rotate freely. If desired‚ laminate the clock face for protection. Finally‚ mount the clock on a wall or use it as a standalone piece. This project is ideal for teaching children about time-telling or adding a personalized touch to your space. Customize the design further with paints‚ stickers‚ or other embellishments to make it unique.

Using Clock PDFs for Crafting and Scrapbooking

Clock PDFs are a fantastic resource for crafting and scrapbooking projects‚ offering a wide range of creative possibilities. Printable clock templates can be customized to match various themes‚ from vintage designs to modern styles‚ making them ideal for scrapbook pages‚ greeting cards‚ or collages. For scrapbooking‚ clock faces can symbolize time‚ memories‚ or milestones‚ adding a unique visual element to your layouts. Crafters can also use clock PDFs to create three-dimensional decorations‚ such as paper clocks for walls or gift tags. Additionally‚ these templates can be incorporated into educational projects‚ such as teaching children about time-telling or creating interactive learning tools. With the ability to print multiple designs‚ clock PDFs provide endless inspiration for both practical and artistic endeavors. Whether you’re a seasoned crafter or a DIY enthusiast‚ these templates offer a versatile way to explore your creativity and bring time-themed ideas to life.

old testament study guide pdf

This guide provides a comprehensive overview of the Old Testament, helping readers navigate its historical context, key themes, and practical study methods effectively.

1.1 Overview of the Old Testament

The Old Testament is the foundational scripture of the Bible, comprising 39 books that chronicle God’s relationship with humanity. It includes the Pentateuch, historical books, wisdom literature, and the Prophets, offering insights into creation, covenant, and redemption. The text spans genres from narratives and poetry to prophecy, providing a rich tapestry of spiritual and historical themes. Understanding the Old Testament is crucial for grasping the New Testament, as it establishes key theological concepts and moral frameworks. Its stories and teachings continue to inspire faith and guide believers today. Study guides simplify this journey, making the Old Testament accessible for deeper exploration and reflection.

1.2 Importance of Studying the Old Testament

Studying the Old Testament is essential for understanding the foundations of Christian faith and Jewish tradition. It reveals God’s character, covenant promises, and redemptive plan, shaping moral and spiritual frameworks. The Old Testament also enriches comprehension of the New Testament, as it establishes key themes and prophecies fulfilled in Jesus Christ. Engaging with its stories, teachings, and prophecies deepens faith, offers practical wisdom, and provides historical context for modern religious practices. Its timeless lessons continue to inspire personal growth and communal worship, making it a vital part of spiritual education and discipleship.

Historical Context of the Old Testament

The Old Testament spans ancient history, from creation to the Babylonian exile, tracing Israel’s journey, culture, and faith, shaping the biblical narrative’s foundational events and themes.

2.1 Background and Timeline

The Old Testament begins with creation and traces the history of Israel through patriarchs, judges, kings, and prophets. Major periods include the Exodus, Kingdoms of Israel and Judah, and the Babylonian exile. Key events like the covenant with Abraham, Moses receiving the Law, and the prophetic messages shape the narrative. Understanding this timeline is crucial for grasping the cultural and theological context of the text, providing a framework for deeper study and reflection on God’s relationship with His people.

2.2 Key Events and Figures

The Old Testament highlights pivotal events and figures that shape its narrative. Key events include creation, the flood, Abraham’s covenant, Moses leading the Exodus, and the conquest of Canaan. Major figures like David, Solomon, and prophets such as Isaiah and Jeremiah play central roles. These events and individuals illustrate God’s interaction with humanity, emphasizing themes of covenant, redemption, and faith. Understanding these elements provides foundational knowledge for interpreting the Old Testament’s theological and historical significance.

Structure of the Old Testament

The Old Testament is divided into the Law, Historical Books, Wisdom Literature, and the Prophets, each section serving distinct purposes in revealing God’s plan and character.

3.1 The Pentateuch: Foundations of the Bible

The Pentateuch, comprising Genesis, Exodus, Leviticus, Numbers, and Deuteronomy, forms the foundational core of the Old Testament. These books outline creation, the patriarchs, deliverance from Egypt, and the giving of the Law. They establish key themes such as covenant, sacrifice, and God’s relationship with humanity. Genesis introduces the world and humanity’s origin, while Exodus highlights divine redemption; Leviticus and Numbers focus on worship and community structure, and Deuteronomy reinforces the Law. This section is essential for understanding biblical theology and history, providing a framework for the rest of Scripture.

3.2 Historical Books: From Joshua to Esther

The Historical Books, spanning from Joshua to Esther, recount Israel’s history, from the conquest of Canaan to the restoration after exile. These narratives include the judges, monarchy, and key events like the Babylonian exile. Books such as Samuel, Kings, and Chronicles detail the rise and fall of Israel’s kingdoms, while Ezra, Nehemiah, and Esther focus on post-exilic restoration. This section provides insight into God’s interaction with His people, emphasizing faithfulness, leadership, and divine sovereignty, offering lessons on obedience and trust in God’s plan.

3.3 Wisdom Literature: Psalms, Proverbs, and More

Wisdom Literature, including Psalms, Proverbs, Job, Ecclesiastes, and Song of Solomon, offers practical life lessons and spiritual insights. Psalms expresses deep emotions and worship, while Proverbs provides timeless wisdom on ethics and decision-making. Job explores suffering, Ecclesiastes reflects on life’s meaning, and Song of Solomon celebrates love. These books guide believers in living wisely, trusting God, and finding balance in life’s complexities, offering both personal reflection and communal worship, enriching faith and daily living with their timeless truths.

3.4 The Prophets: Major and Minor Prophets

The Prophets are a vital section of the Old Testament, divided into Major (Isaiah, Jeremiah, Ezekiel, Daniel) and Minor (Hosea, Joel, Amos, Obadiah, Jonah, Micah, Nahum, Habakkuk, Zephaniah, Haggai, Zechariah, Malachi) Prophets. They delivered God’s messages, calling people to repentance, justice, and faithfulness. Their writings emphasize divine judgment, redemption, and hope, often foreseeing the Messiah and a future kingdom. These prophets addressed both Israel’s failures and God’s enduring love, providing timeless lessons for personal and communal faith, shaping the foundation of Christian theology and ethical living today.

Key Themes and Concepts

The Old Testament emphasizes covenant, law, faith, and redemption, shaping God’s relationship with humanity and outlining moral frameworks for living a righteous life.

4.1 Covenant and Promise

4.1 Covenant andPromise

The covenant is a central theme in the Old Testament, representing God’s binding promises to His people. It begins with Abraham, promising land, descendants, and blessings. The covenant at Sinai establishes Israel as God’s chosen people, with commandments guiding their relationship with Him. These covenants are foundational, showcasing God’s faithfulness and humanity’s responsibility. The concept of promise underscores God’s commitment to His people, even amidst disobedience. This theme underscores redemption and God’s ultimate plan to restore humanity through these sacred agreements.

4.2 Law and Morality

The Old Testament establishes the Law as a moral and ethical framework, primarily through the Ten Commandments and other statutes. These laws govern relationships between God and humanity, as well as among people. They emphasize justice, holiness, and compassion, reflecting God’s character. Obedience to the Law is seen as a form of worship and a means to maintain covenant faithfulness. Over time, the Law evolves to address societal needs, yet its core remains the promotion of righteousness and moral living within the community of Israel.

4.3 Faith and Redemption

Faith in the Old Testament is a trust in God’s promises and covenant faithfulness, exemplified in figures like Abraham and Moses. Redemption is a central theme, often symbolized through deliverance from slavery in Egypt. Sacrificial systems and rituals underscore the need for atonement, pointing to God’s ultimate plan of redemption. These concepts lay the foundation for understanding the Messiah’s role in fulfilling God’s redemptive plan, emphasizing hope and restoration for humanity through divine grace and faith in His promises.

Study Resources and Tools

Explore essential resources like commentaries, study guides, and online platforms such as BibleHub, which offer tools for deeper biblical analysis and study.

5.1 Commentaries and Study Guides

Commentaries and study guides are invaluable tools for understanding the Old Testament. They provide insights from scholars, historical context, and explanations of complex passages. Resources like BibleHub offer detailed commentaries and cross-references, while study guides such as The Step Stone Bible break down sections into manageable lessons. These tools cater to both beginners and advanced learners, offering structured approaches to studying Scripture. Utilizing commentaries can deepen your understanding of the Old Testament’s themes and applications, making your study more enriching and meaningful.

5.2 Online Platforms for Bible Study

Online platforms like BibleHub and others offer extensive resources for Old Testament study. BibleHub provides commentaries, cross-references, and study tools, while platforms like MyStudyBible and Logos offer structured lessons and devotionals. These tools enable users to explore historical context, access scholarly insights, and engage with Scripture deeply. Many platforms also feature reading charts and guided studies, making it easier to stay organized and focused. Leveraging these digital resources enhances the study experience, offering flexibility and accessibility for learners at all levels.

Practical Tips for Effective Study

Consistency, using digital tools, and active engagement are key. Highlight, take notes, and reflect to deepen understanding and make study sessions productive and meaningful.

6.1 Creating a Study Routine

Establish a consistent study schedule by setting specific goals and allocating time daily or weekly. Choose a quiet, comfortable space for focused learning. Use a structured plan, such as reading a set number of chapters or verses each session. Incorporate tools like commentaries or devotionals to enhance understanding. Track progress with a journal or digital app to stay motivated. Consistency fosters deeper engagement and long-term retention of the Old Testament’s teachings. Make it a habit to reflect on key verses and apply lessons to daily life.

6.2 Meditating on Scripture

Begin by finding a quiet, comfortable space to focus. Choose a small portion of Scripture, such as a single verse or passage. Read it slowly, multiple times, to absorb the message. Reflect on the meaning and how it applies to your life. Consider diagramming the verse to uncover deeper insights. Ask questions like, “What is God teaching here?” or “How can I apply this today?” Meditation fosters spiritual growth and a deeper connection to God’s Word, making it a powerful tool for meaningful study and personal transformation.

6.3 Engaging in Group or Personal Study

Engaging in group or personal study enhances understanding and application of the Old Testament. Group study fosters discussion, accountability, and diverse perspectives, while personal study allows for deeper reflection and flexibility. Use tools like commentaries, study guides, and online platforms to enrich your learning. Set clear goals, whether studying alone or with others, and incorporate practices like note-taking and prayer. Both methods encourage spiritual growth and a stronger connection to God’s Word, helping you apply its teachings in everyday life effectively.

amarillo antenna tv guide

Welcome to the Amarillo Antenna TV Guide, your comprehensive resource for free over-the-air TV channels in Amarillo, Texas․ Discover major networks, local channels, and specialty stations without cable or satellite․ This guide helps you cut the cord and enjoy seamless entertainment with a user-friendly approach to antenna TV․

1․1․ Understanding Over-the-Air TV

Over-the-air (OTA) TV uses broadcast signals from local towers, providing free access to major networks like ABC, NBC, FOX, and CW, as well as local and specialty channels․ Antennas capture these signals, offering high-quality HD programming without subscription fees․ OTA TV is a cost-effective way to enjoy live sports, news, and entertainment, ensuring reliable access even during internet outages․ It’s a straightforward, budget-friendly alternative to cable or satellite services․

1․2․ Benefits of Using an Antenna

Using an antenna offers numerous benefits, including free access to high-definition TV channels, no monthly subscription fees, and reliability during internet or cable outages․ It provides crystal-clear reception of local networks, sports, and news․ Antennas are cost-effective, eco-friendly, and eliminate the need for expensive contracts․ They also allow you to enjoy live events and shows without buffering, making them a practical choice for cord-cutters seeking quality entertainment and savings․

Choosing the Right Antenna for Amarillo

Selecting the right antenna ensures optimal reception of Amarillo’s free broadcast TV channels․ Consider factors like signal strength, coverage area, and local programming needs for the best viewing experience․

2․1․ Types of Antennas (Indoor vs․ Outdoor)

Choosing between indoor and outdoor antennas depends on your location and signal strength needs․ Indoor antennas are compact and easy to install, suitable for strong signals․ Outdoor antennas, often larger, provide better range and reliability, especially in areas with weaker signals․ Both options can deliver high-quality HD channels, ensuring access to Amarillo’s free broadcast TV․

2․2․ Signal Strength and Coverage Area

Signal strength and coverage area are crucial for reliable TV reception in Amarillo․ Outdoor antennas generally offer stronger signals and wider coverage, while indoor antennas may struggle with distance and obstacles․ Check your location’s signal strength using online tools to determine the best antenna for your needs․ Strong signals ensure clear HD channels and access to local programming, making your viewing experience seamless and enjoyable․

Amarillo TV Channel Lineup

Amarillo’s TV channel lineup features major networks like ABC, NBC, FOX, and CW, along with local and specialty channels․ This diverse selection ensures a wide variety of programming for all viewers․

3․1․ Major Networks (ABC, NBC, FOX, CW)

Amarillo’s major networks include ABC, NBC, FOX, and CW, offering a variety of programming․ ABC provides popular shows like Wheel of Fortune and local news․ NBC features The Jeffersons and sports coverage․ FOX offers entertainment, while CW includes local shows and events․ These channels are accessible via antenna, ensuring free access to top-tier content for viewers in Amarillo․

3․2․ Local and Specialty Channels

Local and specialty channels in Amarillo offer diverse programming tailored to community interests․ Channels like My Amarillo TV (KCPN) feature syndicated shows, while others provide niche content such as comedy or classic series․ These channels are perfect for viewers seeking local culture, entertainment, and unique programming options, all accessible for free with an antenna․

How to Install an Antenna

Installing an antenna in Amarillo is straightforward․ Choose the right antenna type, place it in an optimal location for signal strength, and connect it to your TV․ Rescan channels to ensure you receive all available stations․ For best results, follow a step-by-step guide or consult a technician if needed․ Proper installation ensures crystal-clear reception of local and network channels, including KAMR-TV4 and KVII HDTV․ This setup provides free access to your favorite shows and events․

4․1․ Step-by-Step Installation Guide

Choose the right antenna type for your needs (indoor or outdoor)․ 2․ Select a location with optimal height and minimal obstructions․ 3․ Connect the antenna to your TV’s coaxial port․ 4․ Rescan for channels to ensure all available stations are detected․ 5․ Adjust the antenna for the best signal strength․ For detailed instructions, refer to the antenna’s user manual or consult a technician if needed․ Proper installation ensures access to major networks and local Amarillo channels like KAMR-TV4 and KVII HDTV․

4․2․ Tips for Optimal Reception

For the best signal, place your antenna near a window or outdoors at a high elevation․ Avoid obstructions like walls or trees․ Use a signal booster if needed․ Rescan channels after moving the antenna to ensure optimal tuning․ Check for firmware updates on your TV or tuner․ Avoid interference from other electronic devices․ Regularly inspect the antenna for damage or loose connections․ Positioning the antenna correctly ensures clear reception of Amarillo channels like KAMR-TV4 and KVII HDTV․

Amarillo TV Listings and Schedules

Check daily and weekly TV listings for Amarillo channels․ View schedules for major networks like KAMR-TV4 and KVII HDTV․ Find what’s playing on antenna, cable, or satellite․
Access guides online or via apps for seamless viewing․ Ensure optimal channel reception by rescanning when necessary․

5․1․ Daily and Weekly TV Guides

Stay updated with Amarillo’s daily and weekly TV schedules․ Check listings for channels like KAMR-TV4, KVII HDTV, and CW Amarillo․ Discover showtimes for popular series, local news, and sports․ Use online guides or mobile apps for real-time updates․ Plan your viewing with detailed programming grids․ Rescan channels regularly to ensure access to all available content․ This feature helps viewers stay informed and entertained with the latest offerings from Amarillo’s broadcast networks․

5․2․ How to Rescan for Channels

Rescanning for channels ensures optimal antenna reception in Amarillo․ Access your TV’s menu, select channel settings, and choose “rescan” or “auto-tune․” This process updates your channel list, ensuring access to all available stations․ Rescanning is quick and essential for maintaining clear signal quality․ For best results, rescan during clear weather to avoid signal interference․ Regular updates help you enjoy uninterrupted access to local news, sports, and entertainment․

Troubleshooting Common Antenna Issues

Facing poor signal quality or missing channels? Check antenna placement, ensure proper connections, and rescan for channels․ Adjust the antenna for better signal strength and clear reception․

6․1․ Poor Signal Quality

Poor signal quality can result from improper antenna placement, physical obstructions, or weak broadcast signals․ Ensure your antenna is positioned correctly, avoiding walls or metal objects․ Try moving it near a window or outdoors for better reception․ Check all connections and consider using a signal booster․ Adjust the antenna orientation to optimize signal strength․ If issues persist, consult a TV technician for professional assistance to enhance your viewing experience․

6․2․ Missing Channels

If channels are missing, ensure your antenna is properly positioned and rescan for available signals․ Check for obstructions or interference from nearby devices․ Verify your antenna supports both UHF and VHF frequencies․ Consider upgrading to a higher-quality antenna or using a signal booster․ Ensure your TV is set to “air” or “antenna” mode during the scan․ If issues persist, consult the channel’s broadcast frequency to ensure it’s within your antenna’s range․

Popular TV Shows and Events in Amarillo

Enjoy popular shows like The Jeffersons and Barney Miller, along with live sports and local news․ Don’t miss high school football games and community events broadcasted for free․

7․1․ Local News and Weather

Stay informed with ABC 7 News at 6 and Wheel of Fortune on KVII HDTV 7․1․ Watch KAMR NBC 4 for regional updates and weather forecasts․ Local news covers Amarillo’s community events, sports, and breaking stories․ Ensure you rescan your TV to receive the latest channels for uninterrupted access to your favorite shows and critical updates․ This keeps you connected to what’s happening in Amarillo and beyond․

7․2․ Sports and Entertainment

Enjoy live sports and entertainment on Amarillo’s antenna TV channels․ Catch high school football games and regional events on KAMR-TV and KVII HDTV․ Popular shows like The Jeffersons and Barney Miller provide classic entertainment․ Stay tuned for local sports coverage, including Amarillo’s favorite teams and events․ With free access to these channels, you can enjoy a mix of sports and entertainment without cable or satellite, making antenna TV a great choice for local content․

Additional Resources

Explore online guides, mobile apps, and technical support for antenna setup and troubleshooting․ Find FAQs and rescan instructions to enhance your viewing experience in Amarillo․

8․1․ Online Guides and Apps

Utilize online guides and apps to streamline your antenna TV experience․ Websites like TV Guide Listings and Antenna Point offer detailed channel lineups and signal strength maps․ Apps such as TV Guide Mobile and Antenna Helper provide real-time schedules and tuning assistance․ These tools help you discover new shows, set reminders, and optimize your antenna placement for better reception; They also include troubleshooting tips and updates for rescan events, ensuring you never miss your favorite programs in Amarillo․

8․2․ Technical Support and FAQs

For technical issues, consult dealers or experienced TV technicians for assistance․ FAQs address common problems like poor signal quality, missing channels, and installation challenges․ Learn how to rescan channels, troubleshoot antenna placement, and resolve connectivity issues․ Manufacturers often provide detailed guides for specific devices․ Additionally, many online forums and support pages offer solutions for optimizing your antenna setup and ensuring uninterrupted viewing in Amarillo․ Reach out to experts for tailored support and reliable solutions․

Enjoy free, high-quality TV with Amarillo’s antenna guide․ Maximize your viewing experience with optimal installation and stay updated on local channels, sports, and events for endless entertainment․

9․1․ Final Tips for Maximizing Your Antenna Experience

For optimal antenna performance, ensure proper installation and positioning to avoid signal interference․ Regularly rescan for channels to access new broadcasts․ Use a high-quality antenna suited for Amarillo’s signal strength․ Keep your TV’s firmware updated for better tuning․ Consider using an amplifier if you live in a low-signal area․ Experiment with antenna placement to achieve the best reception and enjoy crystal-clear, free TV viewing․

9․2․ Stay Updated with Amarillo TV Guide

Stay informed about Amarillo’s TV listings by regularly checking the TV guide for updates․ Channels and schedules may change, so rescan periodically to ensure you’re receiving all available broadcasts․ Follow local news and updates to stay current with programming changes․ This ensures you never miss your favorite shows or new content available through your antenna․ Keeping your guide updated guarantees the best viewing experience in Amarillo․

spelljammer: adventures in space pdf

Spelljammer: Adventures in Space is a Dungeons & Dragons 5th Edition supplement that combines fantasy and space exploration, offering unique ships, races, and settings for thrilling cosmic adventures.

Overview of the Spelljammer Setting

The Spelljammer setting blends fantasy and space exploration, creating a unique universe where magic and cosmic adventure collide. Players navigate the vast expanse of Wildspace and the Astral Plane, encountering strange celestial bodies, mysterious factions, and untold wonders. The setting introduces spelljamming ships, powered by magic, which serve as the primary mode of travel and combat. These vessels are crewed by a variety of races, each with distinct abilities and backgrounds, adding depth to character creation and party dynamics. The setting also features a rich narrative framework, allowing DMs to craft stories that explore themes of discovery, conflict, and survival in the stars. With its blend of fantasy and sci-fi elements, Spelljammer offers a fresh and exciting take on the Dungeons & Dragons experience, appealing to both seasoned players and newcomers alike.

Key Features of the Spelljammer: Adventures in Space PDF

The Spelljammer PDF includes new races, backgrounds, and ships, along with updated mechanics for space travel and combat. It also features detailed setting lore and adventure modules designed for cosmic exploration.

Spelljammer Ships and Their Mechanics

Spelljammer ships are central to the setting, combining magical propulsion and nautical themes. The spelljamming helm allows spellcasters to power and steer these vessels through the Astral Plane and Wildspace. Each ship has unique maneuverability and combat capabilities, with designs ranging from the iconic nautiloid to more fantasticalcraft. Ship-to-ship combat is a key feature, blending magic and naval warfare. Crew management and resource allocation add depth, while customizable ships enable players to tailor their vessels to fit their playstyle. The mechanics are designed to be intuitive yet strategic, making spelljammer ships a core element of both exploration and conflict in the setting.

Races and Backgrounds in Spelljammer

The Spelljammer setting introduces a variety of unique races and backgrounds, each tailored to the cosmic adventure theme. Players can choose from races like the Giff, Astral Elves, and Hadozee, each with distinct abilities and cultural ties to space exploration. These races offer fresh playstyles, blending fantasy and science fiction elements seamlessly. Backgrounds are also crafted to reflect the setting, such as the Spacefarer or Astral Plane Survivor, providing rich storytelling hooks and mechanical bonuses. These options allow players to create characters deeply connected to the mysteries of Wildspace and the Astral Plane. The customizable nature of races and backgrounds ensures a personalized and immersive experience for every player in their interstellar journeys.

Spelljammer Combat and Exploration

Spelljammer Combat and Exploration seamlessly blend fantasy and space elements, offering thrilling ship-to-ship battles and tactical exploration. Players navigate vast cosmic frontiers with unique mechanics and strategies.

Space Combat Mechanics

Space combat in Spelljammer: Adventures in Space introduces unique mechanics that blend fantasy and sci-fi elements. Battles occur in the vast expanse of Wildspace, where ships powered by magic, such as the iconic spelljamming helm, engage in tactical warfare. Unlike traditional land combat, space battles emphasize movement and positioning, with ships maneuvering to exploit enemy weaknesses. Players must manage resources like spelljamming fuel and crew morale, while leveraging abilities unique to their ship’s design. Combat also incorporates spellcasting, allowing mages to influence battles with area effects or precise strikes. The system encourages strategic thinking, as every decision impacts the flow of battle. Whether commanding a sleek warship or a lumbering galleon, players must master these mechanics to prevail in the Astral Plane and beyond.

Exploring Wildspace and the Astral Plane

Exploration in Wildspace and the Astral Plane is a cornerstone of Spelljammer: Adventures in Space, offering players a chance to traverse uncharted celestial realms. Wildspace, a region filled with floating planets and asteroid fields, is home to diverse worlds, each with unique cultures and dangers. The Astral Plane, a realm of swirling colors and psychic phenomena, presents challenges like navigating ethereal currents and encountering powerful entities. Players must adapt to varying gravitational conditions, atmospheric hazards, and magical phenomena. Exploration can lead to discovering ancient ruins, hidden temples, or mysterious artifacts, each providing rich opportunities for storytelling and character development. The Spelljammer setting encourages creativity and curiosity, making every journey through the stars a unique and memorable experience. Whether braving cosmic storms or unraveling celestial mysteries, exploration is a key aspect of the adventure.

Adventure Modules and Campaign Ideas

Spelljammer: Adventures in Space offers a variety of pre-made modules and ideas for crafting unique campaigns, from quests for legendary artifacts to exploring mysterious planets and creating custom storylines.

Sample Adventures and Plot Hooks

Spelljammer: Adventures in Space provides a wealth of ready-to-play adventures and plot hooks, perfect for Dungeon Masters seeking to craft immersive campaigns. One standout adventure involves the quest for a legendary artifact hidden across multiple planets, with each installment revealing a piece of the puzzle. Another engaging hook centers on a mysterious astral phenomenon drawing the party into a conflict between rival factions vying for control of a powerful magical resource. Additionally, the supplement includes scenarios like escaping a drow outpost, negotiating with enigmatic spacefaring races, and uncovering ancient ruins filled with secrets and dangers. These plot hooks are designed to inspire creativity and adaptability, allowing DMs to tailor adventures to their party’s unique style and preferences. Whether it’s combat, exploration, or diplomacy, Spelljammer offers countless opportunities for epic storytelling in the vast expanse of space.

Converting Old Edition Adventures to 5th Edition

Converting classic Spelljammer adventures to 5th Edition is a great way to breathe new life into iconic campaigns. While the core stories and themes remain intact, updating mechanics like stat blocks, spells, and ship combat ensures compatibility with modern rules. The Spelljammer: Adventures in Space PDF provides updated ship mechanics and races, making it easier to adapt old adventures. DMs can maintain the original flavor while enhancing encounters with 5th Edition features like backgrounds and subclass options. For example, incorporating new magic items or adjusting NPC stats to match contemporary balancing. This approach allows for a seamless blend of nostalgia and innovation, giving players a fresh perspective on beloved stories. With some creativity, old-school Spelljammer adventures can shine in the 5th Edition era, offering both familiar and new exciting experiences.

Community Reception and Reviews

Spelljammer: Adventures in Space has received mixed feedback, with praise for its art and creative races but criticism for its lacking adventure structure and disappointing GM screen.

Player and DM Feedback on Spelljammer

Players and DMs have shared mixed opinions on Spelljammer: Adventures in Space. Many praise its unique blend of fantasy and space exploration, with creative ships, races, and settings that inspire imaginative play. The art and world-building are often highlighted as standout features, offering a fresh twist on traditional D&D settings; However, some DMs criticize the adventure structure for being too vague, requiring significant homebrewing to make it engaging. Additionally, the ship combat mechanics have been called overly complex, potentially slowing down gameplay. Despite these challenges, fans of science-fantasy settings appreciate the originality and potential that Spelljammer brings to the table, encouraging creative storytelling and cosmic adventures.

jewelcrafting cataclysm guide

Jewelcrafting in Cataclysm is a key profession for crafting gems, jewelry, and powerful items․ It plays a significant role in the WoW economy and character progression, offering unique benefits for players seeking to enhance their gear or generate gold through crafting valuable items․

1․1 Overview of Jewelcrafting

Jewelcrafting allows players to craft gems, jewelry, and other items for personal use or sale․ It involves cutting and setting gems into sockets of gear, enhancing their stats․ Jewelcrafting is a versatile profession, enabling players to create powerful equipment, including meta-gems and epic items․ Trainers guide players in mastering this skill, which requires specific materials and patterns to produce high-quality items․

1․2 Importance of Jewelcrafting in WoW Economy

Jewelcrafting is a lucrative profession in WoW, enabling players to craft high-demand items like gems, jewelry, and meta-gems․ These items are essential for optimizing gear, making Jewelcrafting a key contributor to the in-game economy․ Players can generate significant gold by crafting and selling these items, especially epic and rare pieces, which are highly sought after for raids and PvP, driving demand and profitability․

Materials Needed for Jewelcrafting

Jewelcrafting requires essential materials like Copper Bar, Tigerseye, Malachite, Heavy Stone, Delicate Copper Wire, Bronze Bar, Small Lustrous Pearl, Bronze Setting, and other ores․

2․1 Common Materials

Crafting jewelry and gems in Cataclysm requires common materials like Copper Bars, Tigerseye, Malachite, Heavy Stone, and Delicate Copper Wire․ These are essential for creating basic items and leveling up․ Bronze Bars, Small Lustrous Pearls, and Bronze Settings are also frequently used․ These materials are widely available from vendors or through mining, making them accessible for early-stage jewelcrafting projects and skill progression․

2․2 Rare and Exotic Materials

Rare materials like Elemental Goos, dropped by Cataclysm elementals, are highly sought after for advanced recipes․ Exotic gems, such as Chimera’s Eye, and Dragon’s Eyes, are crucial for high-end jewelry and meta-gems․ These materials are harder to obtain, often requiring specific drop locations or high-level content, making them valuable for crafting epic and rare items in Cataclysm Jewelcrafting․

Finding and Training Jewelcrafting

Jewelcrafting trainers can be found in major cities like Stormwind and Orgrimmar․ They are easily accessible, allowing players to learn and master the profession efficiently in Cataclysm․

3․1 Locating Trainers

Jewelcrafting trainers are located in major cities like Stormwind and Orgrimmar․ For Alliance, visit the Craftsmen’s Guild, while Horde players can find trainers in the Valley of Strength․ Additional trainers are available in Dalaran and Shattrath for higher-level training, ensuring easy access to mastery of the profession in Cataclysm․

3․2 Requirements to Learn Jewelcrafting

To learn Jewelcrafting in Cataclysm, no specific level is required, making it accessible to new players․ However, having sufficient bag space and initial materials like copper bars and gems is essential․ Training begins with a Jewelcrafting trainer, who teaches the fundamentals․ As you progress, higher-level trainers provide advanced recipes, ensuring you can craft intricate items and gems effectively․

Leveling Your Jewelcrafting Skill

Leveling Jewelcrafting from 1 to 525 requires strategic use of materials and recipes․ Focus on crafting items that provide skill gains efficiently, minimizing material waste and maximizing progression․

4․1 Leveling from 1 to 75

Starting with basic materials like Copper Bar, craft Copper Settings to reach level 50․ Use Tigerseye or Malachite to create earrings or rings, gaining skill points efficiently․ Transition to Heavy Stone for necklaces and rings, ensuring steady progression․ Finally, craft items requiring Delicate Copper Wire to reach level 75, laying a solid foundation for higher levels․

4․2 Leveling from 75 to 150

At level 75, focus on crafting items using Bronze Bar and Small Lustrous Pearl․ Create Bronze Settings and simple jewelry to progress steadily․ Transition to recipes requiring Heavy Stone and Delicate Copper Wire for increased efficiency․ Crafting necklaces and rings with these materials will help you reach level 150, preparing you for more complex recipes in higher tiers․

4․3 Leveling from 150 to 225

From level 150 to 225, focus on crafting items using Heavy Stone, Moonstone, and Jade․ Recipes like Moonstone Ring and Jade Necklace are efficient for skill progression․ Utilize stacks of Heavy Stone to craft multiple items, ensuring steady leveling․ This phase introduces more complex jewelry, requiring a mix of gems and metals to reach level 225 effectively․

4․4 Leveling from 225 to 300

From 225 to 300, jewelcrafting focuses on crafting items with Large Opal, Blue Sapphire, and Yellow Sapphire․ Recipes like Opal Ring and Sapphire Pendant are essential․ Use stacks of Large Opal to maximize efficiency․ This phase introduces more intricate designs, requiring a balance of gems and metals to achieve consistent skill gains up to level 300․

4․5 Leveling from 300 to 375

From 300 to 375, jewelcrafting requires crafting advanced items like Dazzling Silver Ring and Splendid Fire Opal Necklace․ Use stacks of Fire Opal and Star Ruby to ensure steady progress․ This phase introduces more complex recipes, focusing on combining multiple gems and metals to achieve consistent skill gains up to level 375, preparing you for higher-level crafting․

4․6 Leveling from 375 to 450

Leveling from 375 to 450 focuses on crafting high-end items like Necklace of the Deep and Earrings of the Deep․ Use materials such as Deepsea Pearls and Shadow Draenite to maximize skill gains․ Each craft guarantees a skill point, ensuring steady progression․ This phase prepares you for crafting epic gear and meta-gems, making it crucial for achieving mastery in Cataclysm jewelcrafting․

4․7 Leveling from 450 to 525

Leveling from 450 to 525 requires crafting advanced items like Necklace of the Deep and Brilliant Dragon’s Eye․ Use materials such as Nightstone and Shadow Draenite for optimal skill gains․ Each craft provides consistent progression, ensuring you reach the maximum skill level efficiently․ This final stretch unlocks epic recipes and meta-gems, completing your mastery of Cataclysm jewelcrafting․

Jewelcrafting Recipes and Products

Crafting valuable gems and jewelry is central to Jewelcrafting․ Players can create a variety of recipes, including necklaces, rings, and cut gems, essential for gear enhancement and gold-making․

5․1 List of Recipes

Jewelcrafting in Cataclysm offers a diverse range of recipes, from basic necklaces and rings to intricate earrings․ Players can craft items like the Ring of the Nightshade or Necklace of the Deep, using materials such as Copper Bars, Tigerseye, and Small Lustrous Pearls․ These recipes allow for the creation of gear enhancements and decorative items, providing both utility and gold-making opportunities in the game․

5․2 Crafting Gems and Jewelry

Crafting gems and jewelry in Cataclysm involves combining rare materials like Tigerseye and Heavy Stone․ Players can create intricate items such as the Ring of the Nightshade or Necklace of the Deep, which enhance character stats․ This process allows for both practical upgrades and the creation of visually stunning pieces, making it a rewarding and profitable skill for those who master it․

socketing and meta-gems

Socketing and meta-gems enhance gear effectiveness in Cataclysm․ Meta-gems provide powerful bonuses, while socketing allows gem customization․ This section covers their importance and crafting processes in detail․

6․1 Understanding Sockets

Sockets are slots in gear where gems can be inserted to enhance stats․ In Cataclysm, sockets come in different colors and combinations, requiring specific gems to activate bonuses․ Understanding sockets is key to optimizing gear, as they allow customization of stats to suit class and playstyle․ Jewelcrafters play a crucial role in crafting gems for these sockets, making socketing a vital aspect of character progression and item enhancement․

6․2 Crafting Meta-Gems

Crafting meta-gems in Cataclysm requires specific materials and recipes․ These powerful gems provide unique bonuses when socketed in gear with certain gem combinations․ Meta-gems are highly sought after for their ability to enhance stats like intellect, agility, or strength․ Jewelcrafters can craft them using rare materials, making meta-gems a key component in optimizing high-end gear for both PvE and PvP gameplay in World of Warcraft․

epic and rare items

Epic and rare items in Cataclysm Jewelcrafting are highly sought after for their powerful stats and unique effects․ Crafting these items requires rare materials and advanced recipes, making them valuable for both gameplay and gold-making opportunities in World of Warcraft․

7․1 Crafting Epic Items

Crafting epic items in Cataclysm Jewelcrafting requires rare materials like Dark Jade and Shadow Spinel․ These items, such as the Shadowmaw Ring, provide exceptional stats and are highly sought after by players․ Epic recipes are often difficult to obtain and demand high-level skill, making these items both valuable for personal use and lucrative for sale in the WoW economy․

7․2 Creating Rare Jewelry

Creating rare jewelry in Cataclysm involves crafting unique pieces like necklaces and rings using precious gems․ These items often require rare materials such as Dark Jade and Shadow Spinel․ Rare jewelry provides exceptional stats and can be used to enhance character performance․ These items are highly sought after by players, making them valuable for both personal use and sale in the WoW economy․

Cataclysm Jewelcrafting Changes

Cataclysm introduced significant changes to Jewelcrafting, including new recipes, updated material requirements, and the addition of rare gems․ These changes enhanced crafting efficiency and expanded creative options for players, making the profession more dynamic and rewarding in the WoW universe․

8․1 New Recipes and Patterns

Cataclysm introduced a variety of new recipes and patterns for Jewelcrafting, including epic items, rare gems, and meta-gems․ These additions expanded the range of craftable items, allowing players to create more powerful gear and customize their equipment with unique gem combinations, enhancing both gameplay and character progression․

8․2 Changes in Material Requirements

Cataclysm brought significant changes to Jewelcrafting material requirements, introducing new resources and altering existing ones․ Players now needed more rare and exotic materials, such as Elemental Goos and specific gems, to craft high-end items․ These changes shifted the focus toward farming elementals and rare drops, impacting both crafting strategies and the in-game economy․

Cataclysm Jewelcrafting Guide

This comprehensive guide covers leveling Jewelcrafting from 1 to 525, optimal material usage, and strategies for crafting valuable gems and jewelry to enhance your gear or generate gold․

9․1 Leveling Jewelcrafting 1-525

Leveling Jewelcrafting from 1 to 525 requires strategic planning and material management․ Start with common materials like Copper Bars and Tigerseye, then progress to rarer items․ Key recipes include Heavy Stone, Bronze Settings, and Small Lustrous Pearls․ At higher levels, craft meta-gems and epic jewelry to maximize skill gains․ Efficient use of materials ensures rapid progression, allowing players to craft valuable gems and jewelry for character enhancement or gold-making opportunities․

9․2 Best Practices for Crafting

For optimal crafting, plan material usage carefully and prioritize high-demand items․ Focus on gems and jewelry with strong market value․ Utilize daily quests for rare materials and craft meta-gems for advanced gear․ Maintain a balanced inventory to avoid waste and adapt to market trends for maximum profitability․ Regularly check recipes and skill levels to ensure efficient crafting and resource allocation․

9;3 Utilizing Gems and Sockets

Maximizing gem and socket usage is crucial for enhancing gear․ Use high-quality gems to boost stats like agility, strength, or intellect․ Socket bonuses provide additional benefits when specific gem combinations are used․ Craft meta-gems for powerful effects like increased critical strike or mana regeneration․ Always prioritize socketing gear to optimize character performance and ensure meta-gem activation for enhanced gameplay effectiveness․

9․4 Making Gold with Jewelcrafting

Crafting high-demand gems, jewelry, and epic items can generate significant gold․ Focus on cutting rare gems and creating sought-after jewelry․ Offer socketing services for additional profit․ Crafting meta-gems and high-end items like epic jewelry can yield substantial returns․ Monitor market trends to maximize profits and capitalize on demand for specific gems and gear enhancements․

9․5 Advanced Jewelcrafting Techniques

Master advanced techniques like optimizing material usage, crafting rare gems, and creating intricate jewelry․ Utilize meta-gems and socketing strategies to enhance item stats․ Experiment with high-end recipes to produce epic items․ Focus on efficiency to minimize material waste and maximize profitability․ These advanced methods ensure superior craftsmanship and high-demand products in the WoW economy․

gp5500 generac manual

Product Overview and Specifications

The Generac GP5500 is a 5500-watt portable generator designed for residential and commercial use, featuring a gasoline engine and manual start for reliable power supply.

1.1 Key Features of the Generac GP5500

The Generac GP5500 offers a 5500-watt power capacity, ideal for residential and commercial use. It features a durable gasoline engine with a manual start system for reliable performance. The generator includes a sturdy steel frame and wheels for easy portability. It also boasts a low-tone muffler for reduced noise operation and an integrated control panel for straightforward monitoring. With its robust design and essential features, the GP5500 is a versatile solution for backup power needs.

1.2 Technical Specifications and Ratings

The Generac GP5500 has a maximum output of 5500 watts and a rated voltage of 120/240V. It operates at 60Hz with a 10% voltage regulation; The unit features a 389cc gasoline engine, manual choke, and recoil start. It includes a 6.5-gallon fuel tank, providing up to 10 hours of runtime at 50% load. The generator has a noise level of 72 dB(A) and is EPA and CARB compliant, ensuring environmental standards are met. Its compact design and high-quality components make it a reliable choice for power needs.

Safety Guidelines and Precautions

Always follow safety guidelines to avoid hazards. Ensure proper ventilation, keep the generator dry, and never overload it. Read the manual thoroughly before operation.

2.1 General Safety Instructions

Always follow safety guidelines to ensure safe operation. Place the generator on a firm, level surface and keep it dry. Use the correct gauge extension cord to avoid overheating. Never overload the generator or use it near flammable materials. Ensure proper ventilation to prevent carbon monoxide buildup. Follow all instructions in the manual carefully to avoid potential hazards such as fire or electrical shock. Proper safety practices are essential for reliable performance and user protection.

2.2 Hazard Warnings and Compliance

The Generac GP5500 must be operated in accordance with all applicable safety standards. Avoid using the generator in enclosed spaces to prevent carbon monoxide risks. Ensure compliance with local regulations and guidelines for portable generator use. Improper installation or operation can lead to fire hazards, electrical shock, or explosions. Always adhere to the manufacturer’s instructions to maintain safety and compliance. Failure to comply may result in voiding the warranty or posing serious risks to users and property.

Installation and Setup

Ensure the generator is placed on a level, well-ventilated surface, away from flammable materials. Follow the manual for proper electrical connections and initial setup procedures.

3.1 Site Selection and Preparation

Select a level, stable surface for the generator, ensuring good ventilation. Keep it away from flammable materials, windows, and doors. Avoid enclosed spaces to prevent carbon monoxide buildup. Ensure proper drainage and avoid placing it in low-lying areas where water may collect. Clear the area of debris and obstructions. Always follow local regulations and the manual’s guidelines for safe installation. Proper site preparation is crucial for optimal performance and safety.

3.2 Initial Setup and Configuration

Before first use, ensure the generator is on a level surface. Check oil levels and fill as needed. Set the manual lever to “Start” position. Ensure the throttle is in “Fast” position for startup. Connect the battery terminals securely. Test the circuit breaker by resetting it if tripped. Familiarize yourself with control panel functions. Refer to the manual for specific configuration steps. Always ensure the area is clear of obstructions and flammable materials before operation.

Operation and Control

Start the Generac GP5500 by setting the manual lever to “Start.” Ensure the throttle is in “Fast” position for optimal performance. Monitor operations closely.

4.1 Starting and Stopping Procedures

To start the Generac GP5500, ensure the fuel tank is full and the circuit breaker is reset. Set the manual lever to “Start” and move the throttle to “Fast.” Allow the engine to warm up before connecting appliances. For stopping, turn off the breaker, let the engine run briefly to cool, then switch the lever to “Stop.” Always follow safety guidelines in the manual for safe operation.

4.2 Monitoring and Adjusting Settings

Regularly monitor the GP5500’s settings to ensure optimal performance. Check the oil level before each use and adjust the throttle as needed for load requirements. The manual provides guidelines for monitoring voltage, frequency, and engine speed. Adjustments should be made only when the generator is under no load to prevent damage. Refer to the manual for specific instructions on fine-tuning settings for different operational conditions and ensuring safe, efficient power delivery.

Maintenance and Troubleshooting

Regular maintenance and troubleshooting are crucial for extending the lifespan and ensuring efficient operation of your Generac GP5500. This section provides a detailed maintenance schedule, routine inspection checklists, and step-by-step guides for identifying and resolving common issues, helping you keep your generator running smoothly.

5.1 Regular Maintenance Schedule

A well-structured maintenance schedule ensures optimal performance of the Generac GP5500. Essential tasks include oil changes every 50-100 hours, air filter cleaning or replacement, spark plug inspection, and fuel system checks. Regularly inspect the exhaust system for blockages and ensure all connections are secure. Additionally, check the battery terminals for corrosion and perform a thorough visual inspection of cables and wires. Adhering to this schedule prevents unexpected breakdowns and extends the generator’s lifespan. Always refer to the manual for detailed procedures and safety guidelines to ensure safe and effective maintenance practices.

5.2 Common Issues and Solutions

Common issues with the Generac GP5500 include the generator not starting, which can be resolved by ensuring the choke is properly engaged and fuel levels are adequate. If the unit fails to produce power, check for tripped circuit breakers or overloaded circuits. Strange noises may indicate low oil levels or a faulty spark plug, which should be addressed promptly. Refer to the manual for troubleshooting steps, and always follow safety guidelines to avoid further complications. Regular maintenance can prevent many of these issues from arising.

Parts and Accessories

The Generac GP5500 includes an exploded view diagram for easy identification of parts like the manual lever and fuel tank. Visit Generac’s official website for authentic accessories and detailed parts lists to ensure compatibility and performance. Genuine parts are recommended for optimal functionality and safety.

6.1 Exploded View and Parts Diagram

The Generac GP5500 manual includes a detailed exploded view diagram, itemizing components like the manual lever, fuel tank, and engine parts. Refer to Drawing No. 0H1253-A for a visual breakdown. This diagram aids in identifying and ordering genuine Generac parts, ensuring compatibility and safety. It is accessible in the service manual or online, helping users locate specific parts efficiently for maintenance or repairs. Always use authentic parts to maintain performance and warranty compliance.

6.2 Recommended Accessories

The Generac GP5500 manual recommends essential accessories to enhance functionality and maintenance. A generator cover protects the unit from dust and weather. A transfer switch kit ensures safe electrical connections to your home. An oil drain kit simplifies maintenance, while a wheel kit improves portability. These genuine Generac accessories are designed for compatibility and durability, ensuring optimal performance and extending the lifespan of your generator. Always use authorized parts to maintain warranty compliance and safety standards.

Warranty and Support

The Generac GP5500 is backed by a limited warranty for parts and labor. Registration is required for warranty activation. Visit Generac’s official website for detailed terms and customer support contact information.

7.1 Warranty Terms and Conditions

The Generac GP5500 is covered by a limited warranty for parts and labor. Residential use is warranted for 2 years or 500 hours, while commercial or industrial use is covered for 1 year or 500 hours. Proper installation and maintenance are required to validate the warranty. Damage caused by misuse, neglect, or improper maintenance is not covered. The warranty is non-transferable and applies only to the original purchaser. Visit Generac’s website for full warranty details.

7.2 Customer Service and Support

Generac offers comprehensive customer service and support for the GP5500. Contact their dedicated team via phone, email, or live chat for assistance with troubleshooting, maintenance, or warranty inquiries. Visit their official website at Generac.com for detailed resources, including FAQs, user manuals, and repair center locations. Their 24/7 support ensures help is available whenever needed, providing peace of mind for owners. The Generac support team is trained to address a wide range of issues promptly and efficiently.

Additional Resources

Access online manuals, PDF downloads, and support materials for the Generac GP5500 at Generac.com. Find detailed guides, exploded views, and technical documentation;

8.1 Online Manuals and Downloads

The Generac GP5500 manual is available for download as a PDF from Generac’s official website. It includes detailed installation, operation, and maintenance instructions. Users can also access exploded view diagrams, parts lists, and service recommendations. Additionally, the manual provides troubleshooting tips and warranty information. Visit Generac;com to download the latest version of the GP5500 manual or explore other supporting documents for optimal performance and maintenance.

8.2 Generac Official Website and Contact

Visit Generac’s official website at Generac.com for comprehensive support. Find product details, manuals, and customer service options. Contact Generac directly for inquiries or assistance at (888) 330-2538. Their website also offers resources for troubleshooting, parts, and warranty information, ensuring users have all necessary tools for optimal generator performance and maintenance. This direct access streamlines support and enhances user experience.

magic bullet user guide

The Magic Bullet is a versatile and efficient kitchen tool designed to simplify food preparation. Its compact design and powerful motor make it ideal for blending‚ chopping‚ and mixing. With its user-friendly interface and interchangeable blades‚ the Magic Bullet has become a popular choice for home cooks and professionals alike. This guide provides a comprehensive overview of its features‚ safety tips‚ and operational best practices to ensure optimal performance and longevity.

1.1 Overview of the Magic Bullet

The Magic Bullet is a compact‚ high-performance blender designed for versatility in food preparation. It features a powerful motor‚ interchangeable blades‚ and a user-friendly design. Ideal for blending‚ chopping‚ and mixing‚ it simplifies tasks like smoothies‚ sauces‚ and meal prep. Its space-saving structure and ease of use make it a practical addition to any kitchen setup.

1.2 Key Features and Benefits

The Magic Bullet offers a powerful 250-watt motor‚ stainless steel blades‚ and interchangeable cups for versatile use. Its compact design saves space‚ while the easy-to-use interface ensures quick operation. Key benefits include effortless blending‚ chopping‚ and grinding‚ making it perfect for smoothies‚ sauces‚ and meal prep. The tool is also dishwasher-safe‚ ensuring easy cleaning and maintenance.

Safety Precautions

Always read the manual before use to avoid serious injury. Keep hands away from blades‚ supervise children‚ and prevent overheating. Use as directed for safe operation.

2.1 General Safety Guidelines

Always read the manual before use to prevent accidents. Keep hands away from blades‚ avoid overheating‚ and ensure proper assembly. Supervise children and handle the device with care to prevent injury. Use only recommended accessories and follow instructions carefully for safe operation.

2.2 Warning Labels and Instructions

Heed all warning labels to ensure safe operation. Failure to follow instructions may result in injury or damage. Handle blades with care‚ avoid overheating‚ and never leave the device unattended while in use. Use only authorized parts and follow all guidelines to maintain safety and optimal performance.

Components of the Magic Bullet

The Magic Bullet consists of a power base‚ interchangeable blades‚ cups‚ lids‚ and accessories. These components work together to enable efficient blending‚ chopping‚ and mixing for various kitchen tasks.

3.1 Power Base and Motor

The Magic Bullet’s power base houses a robust motor‚ designed for high-speed blending and chopping. The motor operates efficiently‚ providing consistent performance for various tasks. Proper maintenance ensures longevity‚ while built-in safety features prevent overheating. Regular cleaning and avoiding overload are key to maintaining motor efficiency and overall functionality.

3.2 Blades and Cups

The Magic Bullet comes with interchangeable blades‚ including a cross blade for blending and a flat blade for grinding. The cups are BPA-free and dishwasher-safe‚ designed for convenient use. Always ensure blades are securely attached and cups are properly aligned before operation. Regularly inspect and replace worn blades to maintain performance and safety.

3.3 Lids and Accessories

The Magic Bullet includes secure-fit lids designed for spill-proof operation and easy storage. Additional accessories like the recipe guide and storage cups enhance functionality. Always ensure lids are tightly sealed before use. Accessories are dishwasher-safe and BPA-free‚ ensuring durability and safety. Regularly check lids for wear and replace as needed to maintain a secure seal during blending.

Assembly and Preparation

Unpack and wash all components before first use. Attach the blades and cups securely to the power base. Ensure proper alignment and stability for safe operation. Always follow the manual for correct assembly to avoid damage or injury.

4.1 Unpacking and Initial Setup

Begin by carefully unpacking the Magic Bullet components‚ including the power base‚ cups‚ blades‚ and lids. Rinse all parts with warm water before use. Place the power base on a stable‚ flat surface. Refer to the user manual for specific instructions on organizing and preparing each piece for initial operation. Ensure everything is clean and dry for optimal performance;

4.2 Attaching the Blades and Cups

To attach the blades‚ align the blade assembly with the cup and twist gently until it clicks into place. Ensure the blades are securely locked to prevent movement during operation. For the cup‚ place it onto the power base and twist slightly to secure. Avoid over-tightening‚ as this could damage the mechanism. Refer to the manual for diagrams if unsure.

Operating the Magic Bullet

Plug in the Magic Bullet‚ add ingredients‚ and select the desired speed. Use the pulse function for precise control. Allow the motor to stop completely before removing the cup.

5.1 Plugging In and Powering On

Begin by plugging the Magic Bullet into a nearby electrical outlet. Ensure the power base is placed on a stable‚ flat surface. Press the power button to activate the motor. The device will hum softly‚ indicating it’s ready for use. Always ensure hands are clear of moving parts before operation.

5.2 Using the Pulse Function

Press the pulse button to activate short‚ controlled bursts of power. This feature helps prevent over-processing ingredients‚ ensuring desired textures. Use it for chopping nuts‚ herbs‚ or vegetables evenly. Release the button to stop the motor instantly‚ maintaining precise control over your blending process.

5.3 Understanding the Speed Settings

The Magic Bullet offers multiple speed settings to tailor operations for different tasks. Lower speeds are ideal for delicate ingredients or small batches‚ while higher speeds handle tough materials like ice or frozen foods. Adjust the speed based on the ingredient texture and desired outcome for optimal performance and reduced wear on the motor.

Usage Scenarios

The Magic Bullet is incredibly versatile‚ making it perfect for blending smoothies‚ chopping vegetables‚ and preparing frozen drinks. Its efficiency shines in various kitchen tasks‚ offering quick and easy solutions for creative recipes and meal prep.

6.1 Blending and Mixing

The Magic Bullet excels at blending and mixing‚ handling ingredients with ease. Its powerful motor and sharp blades ensure smooth results for smoothies‚ sauces‚ and batters. The pulse function helps break down tough ingredients‚ while the cups provide convenient serving options. Perfect for creating everything from frozen drinks to dips‚ it streamlines your blending tasks efficiently.

6.2 Chopping and Grinding

The Magic Bullet is ideal for chopping and grinding tasks‚ from herbs to nuts. Its powerful motor and interchangeable blades ensure precise results. Use the pulse function for controlled chopping‚ preventing over-processing. Perfect for preparing ingredients like coffee beans or spices‚ it offers consistent grinding for various recipes‚ enhancing your culinary creativity effortlessly.

6.3 Preparing Frozen Drinks

The Magic Bullet excels at crafting frozen drinks with ease. Add ice‚ frozen fruits‚ and liquids to the cup‚ then pulse until smooth. For thicker results‚ blend in short bursts. Experiment with flavors like margaritas or smoothies. Ensure the lid is secure to avoid spills and achieve a perfectly blended texture every time for refreshing treats.

Cleaning and Maintenance

Regular cleaning ensures optimal performance. Disassemble parts after use‚ wash with mild soap‚ and dry thoroughly. Avoid abrasive cleaners to prevent damage. Store components properly to maintain hygiene and longevity‚ ensuring your Magic Bullet remains in excellent condition for consistent results.

7.1 Disassembling After Use

After each use‚ carefully disassemble the Magic Bullet components‚ including the cups‚ lids‚ and blades‚ to ensure thorough cleaning. Separate the power base from the cups and blades to prevent residual food particles from hardening. This step is crucial for maintaining hygiene and preventing bacterial growth‚ ensuring your appliance remains safe and functional for future use.

7.2 Washing and Drying

Wash all components‚ including cups‚ lids‚ and blades‚ with mild soap and warm water. Avoid using abrasive materials or harsh chemicals to prevent damage. Rinse thoroughly and dry with a soft cloth to prevent water spots. Allow all parts to air dry completely before storing to ensure no moisture remains‚ which could lead to mold or bacterial growth.

7.3 Storage Tips

Store the Magic Bullet components in a cool‚ dry place to prevent moisture buildup. Keep the power base separate from other parts to avoid accidental damage. Organize cups‚ lids‚ and blades in a designated container to maintain order. Use a soft cloth to wrap the motor unit for protection. Ensure all accessories are clean and dry before storing to prevent mold or bacterial growth.

Troubleshooting Common Issues

The Magic Bullet may face issues like motor failure or blade malfunctions. Refer to the user manual for solutions or contact customer support for assistance.

8.1 Motor Not Turning On

If the motor doesn’t turn on‚ check the power cord and ensure it’s properly plugged in. Verify the outlet is functioning. Make sure the cup is securely locked onto the power base. Avoid overfilling‚ as this can block the blades. Consult the user manual or contact customer support if issues persist.

8.2 Blades Not Spinning

If the blades aren’t spinning‚ ensure they are correctly attached and aligned. Check for obstructions like food particles. Verify the motor is powering on and the blade assembly is securely locked. If issues persist‚ inspect for worn or damaged parts and replace them as needed. Refer to the manual for further troubleshooting steps.

8.3 Leaks or Weak Suction

Leaks or weak suction may occur due to misaligned parts or worn-out seals. Ensure the cup and lid are properly locked and the O-ring is intact. Check for blockages or food residue. If issues persist‚ inspect the seals for damage and replace them as needed. Consult the user manual for detailed guidance on resolving suction-related problems effectively.

Tips and Tricks

Maximize efficiency by pulsing ingredients for even processing. Avoid overloading cups to maintain performance. Experiment with creative recipes and layered ingredients for optimal results. Regularly clean and dry parts to prevent residue buildup. Store accessories neatly for easy access and longevity of your Magic Bullet.

9.1 Maximizing Efficiency

Maximizing efficiency with the Magic Bullet involves using the pulse function for consistent processing. Chop ingredients before blending to reduce strain on the motor. Layering softer foods at the bottom ensures even mixing. Regular blade sharpening and proper cup alignment also enhance performance. Clean parts post-use to maintain hygiene and optimal functionality over time.

9.2 Avoiding Common Mistakes

Avoid overloading the cup‚ as this can strain the motor. Always follow safety guidelines‚ such as keeping hands away from blades. Ensure proper assembly of parts before use to prevent leaks. Never operate without the lid‚ and avoid using abrasive cleaners. Regularly check and replace worn blades to maintain performance and safety;

9.3 Creative Recipe Ideas

Unleash your creativity with the Magic Bullet by crafting delicious and innovative recipes. Blend vibrant smoothies‚ puree hearty soups‚ or chop fresh herbs for gourmet dishes. Try making homemade salsa‚ energy balls‚ or frozen margaritas. Experiment with unique combinations like tropical fruit blends or vegan chocolate mousse. Let the Magic Bullet inspire your culinary imagination and elevate your meal prep game.

Resources and Support

Access official manuals‚ customer service‚ and online forums for assistance. Visit the manufacturer’s website for troubleshooting guides‚ recipe ideas‚ and replacement parts to enhance your Magic Bullet experience.

10.1 Official User Manuals

The official user manuals for the Magic Bullet provide detailed instructions for assembly‚ operation‚ and troubleshooting. Available online in PDF format‚ these guides cover safety precautions‚ maintenance tips‚ and warranty information. They serve as a comprehensive resource to ensure proper use and longevity of your Magic Bullet appliance‚ helping you get the most out of its features.

10.2 Customer Service Contact

For assistance with your Magic Bullet‚ contact customer service via the official website‚ phone‚ or email. The support team is available to address queries‚ provide troubleshooting help‚ and assist with replacement parts. Visit nutribullet.com for contact details or call 1-800-MAGIC-BULLET for direct support. Email inquiries can be sent to support@magicbullet.com for prompt assistance.

10.3 Online Communities and Forums

Engage with online communities like the Shroomery Message Board and official Magic Bullet forums to connect with users‚ share recipes‚ and troubleshoot issues. These platforms offer valuable insights‚ tips‚ and support from experienced users. Participate in discussions‚ ask questions‚ and explore creative ideas to enhance your Magic Bullet experience. Visit these forums for a wealth of shared knowledge and community support.

The Magic Bullet is a versatile tool that simplifies food preparation‚ blending‚ and more. By following safety guidelines and exploring creative recipes‚ you can maximize its potential. Embrace the convenience and efficiency it offers to enhance your culinary experiences and discover new possibilities every day.

11.1 Final Thoughts

11.2 Encouragement to Explore

Take the leap and explore the endless possibilities your Magic Bullet offers. From blending smoothies to chopping herbs‚ this versatile tool empowers you to create culinary masterpieces effortlessly. Don’t hesitate to experiment with new recipes and techniques—your Magic Bullet is designed to inspire creativity and simplify every step of your cooking journey. Let this guide be your starting point to unlocking a world of flavors and convenience.

intex swimming pool instruction manual

Welcome to the Intex Swimming Pool Instruction Manual! This guide provides essential information to ensure safe, enjoyable, and proper use of your Intex pool. Reading this manual carefully before setup will help extend the pool’s life, ensure safety, and enhance your family’s swimming experience. Follow the instructions step-by-step for assembly, maintenance, and troubleshooting. Visit our website at www.intexdevelopment.com/support for additional resources and videos.

1.1. Importance of Reading the Manual

Reading the Intex Swimming Pool Instruction Manual is crucial for ensuring safe and proper use of your pool. It provides detailed setup, maintenance, and troubleshooting guidance, helping to extend the pool’s life and prevent potential hazards. By following the manual, you can ensure compliance with safety standards and manufacturer recommendations, optimizing your swimming experience. Take time to review it thoroughly before installation and use.

1.2. Intex Pool Models and Types

Intex offers a variety of pool models, including Easy Set, Metal Frame, and Ultra XTR pools, catering to different preferences and needs. Each model varies in size, shape, and features, ensuring there’s a pool for every backyard. The manual provides specific instructions tailored to each model, helping users understand their pool’s unique characteristics and setup requirements. This ensures proper installation and optimal performance.

Safety Precautions and Guidelines

Ensure supervised usage, avoid diving, and follow all safety rules to prevent accidents. Regularly inspect pool equipment and maintain proper water chemistry for a safe swimming environment.

2.1. General Safety Rules for Pool Usage

Always supervise children and avoid diving or jumping into the pool. Ensure all users are free from alcohol or medications that impair judgment. Keep the pool area clear of hazards and regularly inspect the pool and surroundings. Properly maintain water chemistry and follow all safety guidelines provided in the manual to ensure a safe and enjoyable swimming experience for everyone.

2.2. Specific Warnings and Restrictions

Never use the pool in high winds, rapid currents, or open water. Avoid diving or jumping onto or from the pool. Do not leave the pool unattended when in use, especially with children. This product is not a life-saving device. Ensure headroom if used indoors and remove pool covers completely before entering. Always follow the manufacturer’s guidelines for safe and proper usage.

Preparing the Site for Pool Installation

Ensure the site is flat, stable, and dry. Clear debris and obstructions. Choose a location with proper drainage to avoid water accumulation. Follow manual guidelines.

3.1. Choosing the Right Location

Select a flat, stable, and dry area for your pool. Ensure proper drainage to prevent water accumulation. Avoid placing near power lines or uneven surfaces. Keep the site clear of debris and obstructions. Choose a location that is easily accessible for maintenance and not in a low-lying area where water may collect. Ensure the area is level and firm to support the pool’s weight safely.

3.2. Leveling and Clearing the Ground

Ensure the ground is flat and even before setting up your Intex swimming pool. Clear the area of debris, rocks, and grass to prevent damage. For inflatable pools, place a sand base or tarp for extra protection. Check for underground cables and ensure the surface is level using a carpenter’s level. A properly prepared site ensures stability and prevents leaks or structural issues during use.

Assembly and Setup Instructions

Begin by unpacking all components and following the step-by-step guide in your manual. Ensure the pool frame is securely assembled and the pump and filter are properly connected. Inflate the top ring fully and attach all accessories. A team of 2-3 people is recommended for efficient setup. Follow instructions carefully to avoid damage.

4.1. Step-by-Step Pool Assembly Guide

Start by unpacking and organizing all components. Inflate the top ring fully and attach it securely to the pool liner. Assemble the frame by connecting the poles and joints tightly. Ensure the pool is on a level surface. Attach the pump and filter system according to the manual. Connect all hoses and accessories, and test the setup. Refer to the provided diagrams for clarity. Always follow safety guidelines during assembly.

4.2. Connecting Pool Equipment and Accessories

Connect the pump and filter system to the pool inlet and outlet valves. Secure all hoses tightly to prevent leaks. Attach accessories like pool covers, ladders, and lighting according to the manual. Ensure all connections are compatible and follow safety guidelines. Test the equipment before first use to confirm proper function. Refer to the manual for specific instructions on each accessory installation.

Maintenance and Upkeep

Regular cleaning and sanitization are crucial for maintaining your Intex pool. Monitor water chemistry, ensure proper filtration, and follow the manual for optimal pool longevity.

5.1. Regular Cleaning and Sanitization

Regular cleaning is essential for maintaining your Intex pool. Skim the surface daily to remove floating debris and vacuum the pool floor weekly. Sanitize the water by maintaining proper chlorine levels and ensuring the filter pump runs for at least 8-12 hours daily. Clean the filter cartridge regularly and test water chemistry to ensure safety and clarity. Refer to the manual for detailed sanitization guidelines.

5.2. Monitoring Water Chemistry and Filtration

Regularly test and adjust pH and chlorine levels to ensure safe swimming conditions. Use test strips to monitor water chemistry and maintain proper balance. The filter pump should run 8-12 hours daily to keep water clean. Clean or replace the filter cartridge as needed to maintain optimal filtration. Proper water chemistry and filtration are crucial for preventing algae growth and keeping the pool safe for use.

Troubleshooting Common Issues

This section helps identify and resolve common problems like leaks, pump malfunctions, or filtration issues. Follow step-by-step solutions to address these concerns effectively and maintain your pool’s optimal performance.

6.1. Identifying and Solving Leaks

To identify leaks, inspect the pool’s seams, valves, and connections for water droplets or puddles. Tighten loose connections and apply the provided patch kit to small tears. For larger damage, replace the affected part. Regularly check and maintain the pool’s components to prevent leaks and ensure optimal performance. Refer to the troubleshooting guide for detailed repair instructions and maintenance tips to keep your pool secure and functional.

6.2. Addressing Pump and Filter Problems

If your pump or filter malfunctions, turn it off and inspect for blockages or debris. Clean the filter according to the manual and ensure all connections are secure. If issues persist, check for worn or damaged parts and replace them as needed. Regular maintenance, such as cleaning the impeller and ensuring proper water flow, will help prevent future problems and keep your pool running smoothly.

Storage and Disassembly

Properly winterize your pool by draining, cleaning, and drying all components. Store the deflated pool and accessories in a protective box to prevent damage during offseason.

7.1. Proper Winterization Techniques

Winterize your Intex pool by draining all water and cleaning thoroughly. Ensure the pool and accessories are completely dry to prevent damage. Remove all accessories and store the deflated pool in a protective box. Regular inspection and maintenance during storage will help maintain its condition. Always follow the manufacturer’s guidelines for winter storage to ensure longevity and safety. Consult the manual for specific recommendations tailored to your pool model.

7.2. Storing Pool Components Safely

Store your Intex pool components in a clean, dry, and well-ventilated area to prevent mold and damage. Use protective covers for fragile parts like pumps and filters. Organize accessories in labeled bags to avoid misplacement. Ensure all items are completely dry before storage to prevent rust or corrosion. Avoid extreme temperatures and pests. Always refer to the manual for specific storage instructions for your pool model.

Accessories and Additional Features

Intex offers a wide range of pool accessories, including pumps, filters, and cleaning tools. Additional features like LED lights enhance your swimming experience. Durable and reliable solutions for all models.

8.1. Recommended Intex Pool Accessories

Enhance your pool experience with Intex-approved accessories. Essential items include filter pumps, pool covers, and vacuum cleaners for maintenance. For safety, consider pool ladders and _fence systems. Comfort accessories like pool floats and LED lights add fun and ambiance. Always check compatibility with your pool model and visit www.intexdevelopment.com for the latest options.

8.2. Upgrading Your Pool Setup

Elevate your pool experience by upgrading with compatible Intex accessories. Consider adding a larger filter pump for improved water circulation or LED pool lights for enhanced ambiance. Structural upgrades like metal frames or extended liners can increase durability. Additionally, integrate pool heaters or solar covers for energy efficiency. Always ensure upgrades are compatible with your Intex model for optimal performance and safety.

Warranty and Customer Support

Your Intex pool is backed by a comprehensive warranty covering manufacturing defects. For inquiries or issues, contact Intex Customer Support via phone or email. Visit www.intexdevelopment.com/support for detailed warranty terms and support resources.

9.1. Understanding Your Warranty Coverage

Your Intex pool is protected by a limited warranty covering manufacturing defects for a specified period. Proper installation and maintenance are required for warranty validity. Damage from misuse, improper assembly, or extreme weather is not covered. Register your product and retain proof of purchase for warranty claims. Visit www.intexdevelopment.com/support for full warranty terms and conditions.

9.2. Contacting Intex Customer Service

For assistance with your Intex pool, contact our customer service team via phone, email, or through the official website. Visit www.intexdevelopment.com/support for contact details and resources. Ensure to have your product model and serial number ready for efficient support. Our team is available to address inquiries, provide troubleshooting guidance, and assist with warranty claims. Reach out for help with installation, maintenance, or any pool-related concerns.

Tips for Optimal Pool Performance

Maintain optimal pool performance by ensuring proper water chemistry, regular cleaning, and storing equipment correctly. Use genuine Intex parts for longevity and efficiency.

10.1; Maximizing Pool Longevity

Regular maintenance is key to maximizing your Intex pool’s longevity. Ensure proper water chemistry balance, clean the pool regularly, and store equipment correctly during off-season. Avoid using harsh chemicals and always follow the manufacturer’s guidelines. Inspect the pool and its components for wear and tear, and replace parts as needed. Using genuine Intex accessories and avoiding overexposure to sunlight can also extend the pool’s lifespan.

10.2. Energy-Saving Practices

Implement energy-saving practices to reduce your pool’s environmental impact and lower costs. Use energy-efficient pump timers and adjust runtime based on usage. Maintain proper water levels to minimize pump workload. Consider solar covers to reduce heating needs and prevent evaporation. Shade structures can also reduce direct sunlight exposure, lowering water temperature and energy consumption. These practices help conserve energy and extend equipment life.

11.1. Final Checklist for Pool Setup and Maintenance

Ensure the pool is correctly assembled, leveled, and secured. Connect all equipment properly and test functionality. Regularly clean and sanitize the pool. Monitor water chemistry and filtration. Perform seasonal maintenance and winterization. Store accessories safely. Follow safety guidelines and warranty instructions. Review the manual periodically for updates. Enjoy your Intex pool responsibly and safely with family and friends.

11.2. Enjoying Your Intex Swimming Pool

Once your pool is properly set up and maintained, it’s time to enjoy it! Gather family and friends for fun-filled days of swimming and relaxation. Always supervise children and ensure safe entry and exit. Regularly inspect equipment and maintain proper water conditions. Follow all safety guidelines and enjoy the refreshing experience your Intex pool provides. Happy swimming and make lasting memories!

Additional Resources

Visit www;intexdevelopment.com/support for downloadable manuals, troubleshooting guides, and FAQs. Explore online forums and communities for shared experiences and tips on optimizing your Intex pool setup and maintenance.

12.1. Downloading Manuals and Guides

Access a wide range of Intex Swimming Pool manuals and guides on www.intexdevelopment.com/support. Download PDF manuals for specific models like Intex Ultra XTR or Prism Frame. Visit ManualsLib for additional resources, including setup instructions, troubleshooting tips, and warranty details. Search by model number or product name to find your exact guide. Ensure you have the latest version for accurate information and optimal pool performance.

12.2. Online Communities and Forums

Join online communities and forums to connect with other Intex pool owners and experts. Share experiences, ask questions, and find solutions to common issues. Visit platforms like ManualsLib or Intex’s official support page for user-generated content and tips. Engage with forums to troubleshoot setup, maintenance, or repair challenges. These resources offer valuable insights and practical advice to enhance your pool experience and resolve issues efficiently.

icewind dale rime of the frostmaiden pdf

This adventure module‚ designed for levels 1-12‚ offers a chilling journey through the frozen wilderness of Icewind Dale‚ crafted by Wizards RPG Team.

The PDF version provides a comprehensive guide‚ filled with sandbox material‚ dark secrets‚ and compelling backstories‚ perfect for creating unique characters and immersive experiences.

1.1 Overview of the Adventure Module

Icewind Dale: Rime of the Frostmaiden is a comprehensive adventure module designed for Dungeons & Dragons 5th Edition‚ spanning levels 1-12. The PDF version offers a detailed guide‚ including starting quests‚ key locations‚ and game mechanics. It provides a rich sandbox experience‚ allowing players to explore the frozen wilderness‚ uncover dark secrets‚ and confront the forces of the Frostmaiden‚ Auril. The module is packed with unique scenarios‚ monsters‚ and items‚ making it a versatile tool for Dungeon Masters to craft engaging campaigns.

1.2 Background and Setting in the Forgotten Realms

Icewind Dale: Rime of the Frostmaiden is set in the Forgotten Realms‚ specifically in the icy expanse of Icewind Dale. This frozen frontier‚ inspired by Nordic mythology‚ features a harsh‚ snow-covered landscape dominated by the looming presence of Auril‚ the Frostmaiden. The adventure unfolds in the Ten-Towns region‚ where survival is a daily struggle. The setting blends winter themes‚ ancient magic‚ and forgotten ruins‚ creating a chilling backdrop for exploration and adventure. The PDF details the lore and geography of this frostbitten land.

Story and Main Plot

Auril‚ the Frostmaiden‚ spreads her icy grip over Icewind Dale‚ plunging the region into darkness and cold. Players must uncover the source of the ever-growing frost and confront the duergar’s sinister plots and the Sunblight’s eerie threat to restore balance to the frozen wilderness.

2.1 The Role of Auril‚ the Frostmaiden

Auril‚ the Frostmaiden‚ is central to the story‚ her icy influence spreading the “Everlasting Rime” across Icewind Dale. Her divine power grips the land‚ plunging it into cold and darkness‚ creating a dire threat to the region’s survival. The adventure revolves around her chilling dominion and the mysterious forces she commands‚ fostering a tense atmosphere of survival and discovery. Her role intertwines with the frozen wilderness‚ making her a formidable antagonist tied to the adventure’s core themes of winter and isolation. The PDF details her influence on the setting and the quest to confront her icy reign.

2.2 The Frozen Wilderness and Its Challenges

The frozen wilderness of Icewind Dale is a central element‚ featuring harsh environments and unique locations like Sunblight‚ with strategic maps and rewarding exploration. The Everlasting Rime has made travel perilous‚ with routes impassable and survival a constant challenge. The PDF details encounters‚ key areas‚ and the oppressive grip of winter‚ creating a tense setting where players must navigate both the cold and Auril’s influence‚ adding depth to the adventure’s survival themes.

Character Creation and Backgrounds

The PDF offers unique character races‚ classes‚ and dark secrets‚ enabling players to craft compelling backstories that immerse them in Icewind Dale’s frozen world.

3.1 Unique Character Races and Classes

The PDF introduces unique character races and classes tailored to Icewind Dale’s harsh environment‚ offering fresh playstyles that enhance the frozen setting’s survival themes.

Players can explore races like the frost-touched Tiefling or the resilient Goliath‚ alongside classes that emphasize adaptation‚ ensuring a deep connection to the icy world.

3.2 Dark Secrets and Compelling Backstories

The PDF version delves into dark secrets and intricate backstories‚ adding depth to characters. Players can uncover hidden truths‚ like Yselm’s secret worship of Auril or Dannika Graysteel’s mysterious scholarly pursuits‚ creating rich narratives. These elements encourage players to craft compelling characters with personal stakes‚ enhancing immersion in Icewind Dale’s frozen world.

Adventure Structure and Chapters

The adventure is divided into key chapters‚ featuring early quests‚ strategic locations like Sunblight‚ and encounters that enhance exploration and storytelling‚ aiding DMs in cohesive campaign management.

4.1 Early Quests and Starting Points

The adventure begins with early quests that provide a clear direction for players‚ setting the tone for exploration and intrigue. Starting points include interactions with key figures like Dannika Graysteel and Yselm‚ a secret Auril worshiper. These quests introduce the frozen wilderness and its dangers‚ offering a blend of combat‚ exploration‚ and role-playing opportunities. The Ten-Towns serve as a central hub‚ with rumors and encounters guiding players into the icy unknown.

4.2 Key Locations and Encounters

Key locations in Icewind Dale include the Sunblight set piece‚ a strategic map with exploratory rewards‚ and the frozen wilderness where Auril’s influence dominates. Encounters range from battling frostbitten creatures to discovering lost cities trapped in glaciers. The adventure also features unique locations like Stone Cabin‚ Frozen Pier‚ and Hole in the Ice‚ providing diverse settings for exploration and combat‚ enriching the overall narrative and player experience.

Monsters and Enemies

Auril’s minions‚ including frostbitten creatures and duergar‚ pose significant threats. The adventure features a variety of enemies‚ from icy beasts to powerful foes‚ challenging players strategically.

5;1 Auril’s Minions and Frozen Creatures

Auril‚ the Frostmaiden‚ commands an array of icy minions‚ including winter wolves‚ frost giants‚ and other frozen beings. These creatures embody the harsh‚ unrelenting power of winter‚ serving as both guardians and enforcers of Auril’s dominion over Icewind Dale. Encounters with these beings are central to the adventure‚ offering players a taste of the Frostmaiden’s relentless chill and the dangers of her frozen realm. The creatures’ abilities and tactics reflect the unforgiving nature of the environment‚ making them formidable opponents in survival and combat scenarios.

5.2 The Duergar and Their Plot

The duergar‚ led by the deceitful Xardorok‚ play a significant role in the adventure‚ manipulating events to serve their own agenda. Believing they follow Deep Duerra‚ Xardorok’s true allegiance lies with Asmodeus‚ adding layers of intrigue. Their plot involves forging a dragon from chardalyn‚ a scheme that intertwines with Auril’s influence‚ creating a complex web of threats for players to unravel and confront in the frozen wilderness of Icewind Dale.

Tips for Dungeon Masters

Dungeon Masters can enhance the adventure by effectively managing wilderness encounters and ensuring a cohesive story flow‚ utilizing the provided tools and tips to create an immersive experience.

6.1 Running the Adventure Effectively

Running Icewind Dale: Rime of the Frostmaiden effectively requires balancing the cold‚ isolated environment with dynamic storytelling. DMs should emphasize the harsh winter conditions and isolation to heighten tension. Use the PDF’s resources to create engaging encounters and maintain a steady pace. Encourage player agency while guiding them through the frozen wilderness and its mysteries. The adventure thrives on adaptability‚ so be prepared to improvise and tailor the story to your party’s choices.

6.2 Managing Wilderness Encounters and Exploration

Managing wilderness encounters and exploration in Icewind Dale: Rime of the Frostmaiden requires careful planning and improvisation. The PDF provides detailed maps and encounter tables to enhance exploration‚ such as Sunblight and Frozen Pier‚ offering strategic and exploratory rewards. DMs should use the harsh environment to create tension‚ leveraging weather hazards and survival mechanics. Balancing exploration with combat and narrative is key‚ ensuring players feel the isolation and danger of the frozen wilderness while staying engaged with its mysteries.

Themes and Tone

Exploring horror‚ survival‚ and Nordic mythology‚ the adventure evokes a harsh‚ mysterious tone‚ emphasizing the cold’s deadly embrace and isolation‚ enhancing the frozen setting’s eerie atmosphere.

7.1 Horror and Survival Elements

The adventure masterfully blends chilling horror with survival challenges‚ creating a tense atmosphere. Players face the biting cold‚ eerie landscapes‚ and terrifying creatures like Auril’s minions‚ enhancing the sense of dread. Sunblight‚ a standout location‚ offers strategic combat and exploration‚ rewarding careful planning. The frozen wilderness isolates characters‚ emphasizing resource scarcity and the constant threat of environmental hazards‚ making survival as crucial as combat prowess in this unforgiving setting.

7.2 Nordic Mythology and Winter Themes

Set over a century after The Crystal Shard‚ the module draws inspiration from Nordic mythology‚ weaving winter’s chill with mystical elements. The Frostmaiden‚ Auril‚ embodies the harsh beauty and danger of winter‚ her influence permeating the frozen landscape. The adventure’s setting‚ with its icy vistas and lost cities entombed in glaciers‚ evokes a sense of cold‚ dark wonder‚ immersing players in a world where survival and myth intertwine seamlessly.

Availability and PDF Version

The PDF version of Icewind Dale: Rime of the Frostmaiden is available on official platforms‚ offering convenience for digital play. Legal purchase supports creators and ensures access to all content.

8.1 How to Access the PDF

The PDF version of Icewind Dale: Rime of the Frostmaiden is available on official D&D platforms like D&D Beyond or the official Wizards of the Coast website. Ensure you purchase it legally to support the creators. The PDF is optimized for digital devices‚ allowing easy access during gameplay. It includes all content‚ from character backgrounds to adventure chapters‚ in a convenient format for both players and Dungeon Masters.

8.2 Legal and Ethical Considerations

Accessing the PDF legally is crucial to support creators and respect intellectual property. Purchase from official sources like D&D Beyond or Wizards of the Coast to avoid piracy. Sharing or downloading pirated copies undermines the developers’ efforts and violates copyright laws. Always opt for legitimate platforms to ensure you receive the complete‚ high-quality content while contributing to the RPG community’s sustainability.

Community and Resources

The community thrives on forums like Reddit’s r/RimeOfTheFrostmaiden‚ where DMs and players share insights‚ homebrew content‚ and strategies‚ enriching the adventure experience collectively.

9.1 Online Forums and Discussions

Online forums like Reddit’s r/RimeOfTheFrostmaiden and D&D Beyond host vibrant discussions‚ where players and DMs share strategies‚ homebrew content‚ and tips for running Icewind Dale: Rime of the Frostmaiden. These platforms are rich with resources‚ from character builds to encounter ideas‚ fostering a collaborative community that enhances the adventure experience for everyone involved.

9.2 Homebrew Content and Fan Creations

Fans of Icewind Dale: Rime of the Frostmaiden have crafted an array of homebrew content‚ from custom character races and subclasses to unique adventure hooks. These creations‚ shared on platforms like D&D Beyond and Reddit‚ offer fresh perspectives on the frozen wilderness and Auril’s influence‚ inspiring DMs to expand the adventure with community-driven ideas and imaginative twists.

Icewind Dale: Rime of the Frostmaiden is a must-play for fans of cold-weather adventures‚ offering a rich‚ immersive experience with its detailed world and chilling storylines.

10.1 Summary of the Adventure’s Strengths

Icewind Dale: Rime of the Frostmaiden excels in its engaging story‚ rich setting‚ and variety of quests. The module offers a chilling narrative centered around Auril‚ the Frostmaiden‚ and her icy grip on the frozen wilderness. With detailed locations like Sunblight and immersive survival mechanics‚ it provides a unique blend of horror and adventure. The PDF version is packed with creative encounters‚ making it a standout choice for both players and DMs seeking a memorable experience.

10.2 Recommendations for Players and DMs

Players should embrace the harsh winter setting by crafting resilient characters with strong backstories. DMs are encouraged to emphasize survival mechanics and utilize the module’s rich lore to enhance immersion. Exploring the frozen wilderness and engaging with its challenges will deepen the experience. The PDF version offers a wealth of resources‚ making it an essential tool for both new and seasoned adventurers in Icewind Dale.

easy home air conditioner manual

Your Easy Home air conditioner manual provides essential guidance for installation‚ operation‚ and maintenance․ Models like the 8000 BTU EPA080BAUW‚ GT-SF-LKM-01‚ and 5000 BTU Window Air Conditioner 2891 are covered․ These manuals ensure proper setup and optimal performance‚ helping you maximize cooling efficiency and extend the unit’s lifespan․ Refer to your specific model’s manual for detailed instructions and troubleshooting tips․

1․1 Overview of Easy Home Air Conditioner Models

Easy Home offers a range of air conditioner models‚ including the 8000 BTU EPA080BAUW‚ GT-SF-LKM-01‚ and 5000 BTU Window Air Conditioner 2891․ These models vary in BTU ratings‚ suitable for different room sizes‚ and offer features like cooling‚ dehumidification‚ and air circulation․ Each model is designed for efficiency and ease of use‚ catering to various home cooling needs․

1․2 Importance of Using the Manual for Proper Operation

Using your Easy Home air conditioner manual ensures proper installation‚ operation‚ and maintenance․ It provides essential safety precautions‚ troubleshooting tips‚ and optimal performance guidelines․ Neglecting the manual may lead to inefficient cooling‚ increased energy bills‚ or even unit damage․ Always refer to your model-specific manual for accurate instructions and to avoid potential risks․

Popular Easy Home Air Conditioner Models

Easy Home offers models like the 8000 BTU EPA080BAUW‚ GT-SF-LKM-01‚ and 5000 BTU Window Air Conditioner 2891․ These units are designed for efficient cooling and durability․

2․1 Easy Home 8000 BTU EPA080BAUW

The Easy Home 8000 BTU EPA080BAUW is a powerful air conditioner designed for rooms up to 450 square feet․ It features efficient cooling‚ air circulation‚ and a user-friendly design․ The manual provides detailed instructions for installation‚ operation‚ and maintenance‚ ensuring optimal performance and energy efficiency․ It’s a popular choice for both residential and small commercial spaces․

2․2 Easy Home GT-SF-LKM-01

The Easy Home GT-SF-LKM-01 is a compact and efficient air conditioner designed for small to medium-sized spaces․ It offers reliable cooling performance and user-friendly controls․ The manual provides detailed guidance on installation‚ operation‚ and maintenance‚ ensuring optimal functionality․ This model is known for its portability and energy-saving features‚ making it a practical choice for homeowners seeking affordable cooling solutions․

2․3 Easy Home 5000 BTU Window Air Conditioner 2891

The Easy Home 5000 BTU Window Air Conditioner 2891 is a compact and energy-efficient cooling solution designed for small rooms․ Its manual provides detailed instructions for installation‚ operation‚ and maintenance․ With a 68-page guide‚ users can easily understand how to optimize performance and troubleshoot common issues․ This model is ideal for homeowners seeking an affordable and reliable cooling option․

Installation Guidelines

Proper installation is crucial for optimal performance․ Follow step-by-step instructions for window and portable units‚ ensuring a secure fit and level placement․ Refer to your specific model’s manual for safety precautions and manufacturer recommendations to avoid damage or injury․ This ensures efficient cooling and extends the unit’s lifespan․

3․1 Step-by-Step Window Air Conditioner Installation

Ensure the window is properly sized and clean․ Unpack and position the unit securely in the window‚ using the provided brackets․ Screw firmly into place and seal gaps with foam․ Connect electrical components safely‚ plugging directly into a power source․ Set up drainage if required‚ especially for dehumidifying modes․ Test the unit to ensure proper operation․ Always follow manufacturer guidelines for a safe and efficient setup․

3․2 Portable Air Conditioner Setup and Placement

Place the portable air conditioner on a level surface in a well-ventilated area․ Ensure proper drainage by positioning the unit near a window for exhaust hose installation․ Avoid direct sunlight and heat sources․ Securely attach the exhaust hose to the window kit‚ ensuring a tight seal․ Keep the unit away from obstructions for optimal airflow and efficiency․ Follow manual guidelines for correct setup and safety․

Maintenance and Troubleshooting

Regular cleaning of filters and checking drain setups ensure optimal performance․ Troubleshooting common errors and understanding error codes help maintain efficiency and extend the unit’s lifespan․

4․1 Cleaning Filters for Optimal Performance

Regularly cleaning your air conditioner’s filters is crucial for maintaining efficiency and airflow․ Dirty filters can reduce cooling performance and increase energy consumption․ Simply remove‚ wash with mild soap‚ and rinse thoroughly․ Ensure filters are dry before reinstalling to prevent mold growth․ Replace filters every 1-2 months for optimal performance and air quality․

4․2 Continuous Drain Setup for Dehumidifying Mode

For continuous drain setup in dehumidifying mode‚ ensure the unit is on a level surface․ Connect a drain hose to the designated outlet and direct it to a suitable drainage location․ Regularly check for blockages to prevent water accumulation․ This setup ensures efficient water removal during operation․ Refer to your model’s manual‚ like the Easy Home 8000 BTU EPA080BAUW‚ for specific instructions․

Operating Modes and Functions

Easy Home air conditioners feature multiple operating modes‚ including Cool‚ Fan‚ and Dry․ These modes provide effective cooling‚ air circulation‚ and dehumidification․ Refer to your manual for specific model functions;

5․1 Cool Mode for Effective Cooling

Cool Mode is designed to efficiently lower room temperature․ Adjust the thermostat and fan speed via the remote control for personalized comfort․ Ensure proper airflow by closing doors and windows․ Regularly clean filters to maintain performance․ For optimal results‚ set the mode when the room is empty to avoid frequent temperature adjustments․ Refer to your manual for specific model settings․

5․2 Fan Mode for Air Circulation

Fan Mode circulates air without cooling‚ ideal for maintaining airflow in well-ventilated spaces․ Use the remote to select fan speed settings (low‚ medium‚ high)․ This mode is energy-efficient and suitable when cooling isn’t needed․ It helps distribute filtered air‚ improving indoor air quality․ Activate Fan Mode to keep air moving without active cooling‚ ensuring a comfortable environment․

5․3 Dry Mode for Dehumidification

Dry Mode removes excess moisture from the air‚ reducing humidity without excessive cooling․ Ideal for humid environments‚ it prevents mold growth and keeps rooms comfortable․ Use the remote or control panel to activate Dry Mode․ The unit will automatically adjust to dehumidify‚ improving air quality and energy efficiency․ Continuous drain setup is recommended for optimal performance in this mode․

Energy Efficiency Tips

Adjust thermostat settings to balance comfort and energy savings․ Regularly clean filters and maintain your unit to optimize performance․ Compare models for energy efficiency ratings to reduce costs․

6․1 Adjusting Thermostat Settings for Savings

Adjusting your Easy Home air conditioner’s thermostat settings can significantly reduce energy consumption․ Raise the temperature when the room is unoccupied to minimize cooling demands․ Using a programmable thermostat allows you to set schedules‚ ensuring efficient operation․ Maintaining consistent temperatures prevents frequent cycling‚ which saves energy and extends the unit’s lifespan․ Optimize settings for comfort and savings․

6․2 Comparing Energy Efficiency Across Models

Comparing energy efficiency across Easy Home air conditioner models helps determine the most cost-effective option․ The 8000 BTU EPA080BAUW and 5000 BTU Window Air Conditioner 2891 offer varying energy-saving features․ Check the EER (Energy Efficiency Ratio) and ENERGY STAR ratings to identify the most efficient model for your needs‚ ensuring lower utility bills while maintaining cooling performance․

Safety Precautions

Always follow electrical safety guidelines and ensure proper installation to prevent unit damage or injury․ Avoid using damaged cords and keep the area clear for safe operation․

7․1 Power Safety and Electrical Requirements

Ensure your Easy Home air conditioner is plugged into a grounded outlet with the correct voltage rating․ Avoid using damaged cords or overloaded circuits․ Never install the unit near water sources or in areas exposed to excessive moisture․ Keep the electrical components away from heat sources or flammable materials to prevent hazards․ Always follow the manual’s wiring instructions for safe operation․

7․2 Proper Usage to Avoid Damage or Injury

Always read the manual before operating your Easy Home air conditioner․ Ensure proper installation to prevent water leakage or electrical hazards․ Avoid exposing the unit to direct water or extreme temperatures․ Regularly clean filters and drain excess water to maintain efficiency and safety․ Keep children away from moving parts and ensure the unit is stable to prevent tipping․

Advanced Features and Settings

Explore advanced features like remote control operation and timer functions․ These settings enhance convenience‚ allowing automated cooling and personalized comfort for optimal performance․

8․1 Remote Control Operation

The remote control offers convenient operation of your Easy Home air conditioner․ Adjust temperature‚ fan speed‚ and modes effortlessly from a distance․ This feature enhances comfort and ease of use‚ allowing precise control over cooling settings without moving from your spot․ Refer to your manual for specific remote functions and pairing instructions to ensure seamless operation․

8․2 Timer Function for Automated Cooling

The timer function allows you to schedule your Easy Home air conditioner to turn on or off automatically․ This feature optimizes energy usage by cooling only when needed․ Set the timer to start cooling before you arrive home or turn it off during the night․ Refer to your manual for step-by-step setup instructions to maximize convenience and energy savings․

Common Issues and Solutions

Common issues with Easy Home air conditioners include improper cooling or noisy operation․ Solutions often involve cleaning filters‚ checking drain setups‚ or ensuring proper installation․ Refer to your manual for troubleshooting guides tailored to your specific model to resolve issues efficiently and maintain optimal performance․

9․1 Troubleshooting Common Errors

Common errors with Easy Home air conditioners include issues like improper cooling‚ excessive noise‚ or water leakage․ Troubleshooting steps often involve checking filter cleanliness‚ ensuring proper drainage‚ and verifying electrical connections․ Refer to your model’s manual for specific error codes and solutions․ Regular maintenance‚ such as cleaning filters and inspecting hoses‚ can prevent many issues․ Addressing problems early ensures efficient operation and extends the unit’s lifespan․

9․2 Understanding Error Codes

Error codes on Easy Home air conditioners indicate specific issues‚ helping users identify and resolve problems efficiently․ Each code corresponds to a particular malfunction‚ such as sensor errors or drainage issues․ Refer to your unit’s manual or the manufacturer’s website for code meanings․ Understanding these codes enables quick troubleshooting‚ ensuring optimal performance and prolonging the appliance’s lifespan․

User Feedback and Ratings

Users generally rate Easy Home air conditioners highly‚ with models like the 8000 BTU EPA080BAUW receiving praise for performance and ease of use․

10․1 Customer Reviews of Popular Models

The Easy Home 8000 BTU EPA080BAUW air conditioner manual is highly rated‚ with users praising its cooling efficiency and ease of installation․ The GT-SF-LKM-01 model also receives positive feedback for its portability and quiet operation․ Customers appreciate the detailed instructions provided in the manuals‚ which simplify setup and troubleshooting․ However‚ some users note occasional issues with remote control functionality and durability over time․

10․2 Average Ratings and Satisfaction Levels

Easy Home air conditioners generally receive positive ratings‚ with the 8000 BTU EPA080BAUW model averaging 9․2/10․ The GT-SF-LKM-01 and 5000 BTU Window Air Conditioner 2891 also hold strong satisfaction levels․ Customers praise their cooling performance‚ energy efficiency‚ and user-friendly designs․ However‚ some models have lower ratings due to occasional issues with remote controls and noise levels during operation․

Additional Resources

Access Easy Home air conditioner manuals on websites like Manuals․co․uk and Manualzz․ These platforms offer free downloads and comprehensive guides for various models in PDF format․

11․1 Where to Download Easy Home Manuals

Easy Home air conditioner manuals are available for free download on platforms like Manuals․co․uk and Manualzz․ These websites offer PDF versions of manuals for models such as the 8000 BTU EPA080BAUW‚ GT-SF-LKM-01‚ and 5000 BTU Window Air Conditioner 2891․ Additional resources can also be found on the official Easy Home website or through online forums and support communities․

11․2 Online Forums for Support and Discussions

Online forums and communities provide valuable support for Easy Home air conditioner users․ Websites like Manuals․co․uk and All-Guides Database host discussions and Q&A sections․ Users can share experiences‚ troubleshoot issues‚ and access tips for models like the 8000 BTU EPA080BAUW and GT-SF-LKM-01․ These platforms foster collaboration and offer practical advice for optimizing your air conditioner’s performance and resolving common problems effectively․

This comprehensive guide covers essential aspects of Easy Home air conditioner manuals‚ ensuring proper operation and maintenance for optimal cooling and longevity․ Refer to your model’s manual for specific instructions․

12․1 Summary of Key Points

This guide provides essential information for Easy Home air conditioner manuals‚ covering installation‚ operation‚ and maintenance․ Popular models like the 8000 BTU EPA080BAUW‚ GT-SF-LKM-01‚ and 5000 BTU Window Air Conditioner 2891 are highlighted․ Emphasizing energy efficiency‚ proper setup‚ and regular maintenance ensures optimal performance․ By following these guidelines‚ users can maximize cooling efficiency and extend their air conditioner’s lifespan effectively․

12․2 Final Tips for Maximizing Air Conditioner Performance

For optimal performance‚ regularly clean filters‚ adjust thermostat settings‚ and use the timer function․ Ensure proper installation and placement to maximize cooling efficiency․ Refer to your specific model’s manual for tailored guidance․ By following these tips‚ you can enhance your air conditioner’s performance‚ reduce energy consumption‚ and extend its lifespan effectively․

« Older posts Newer posts »